


Android proxy setup is usually quick, but authentication prompts and "no internet" errors can confuse first-time users. This guide covers Android Wi-Fi proxy setup, why authentication fails on some devices and apps, and practical fixes like IP allowlisting and third-party proxy client apps.
What are Android’s Native Proxy Capabilities?
Android natively supports HTTP and HTTPS proxies on Wi-Fi networks. You can configure it manually through your device's network settings. However, this support has clear limits.
It typically applies only to browser traffic and to apps that respect system network settings. However, it doesn't extend to mobile data without APN edits, and it offers no built-in option for SOCKS5 proxies or reliable username-and-password authentication.
For a deeper look at how Android handles proxy configurations under the hood, you can check the Android ProxyInfo API reference.
Ways to configure a proxy on Android
There are three main ways to configure a proxy on Android. Each one may suit a different situation. Pick the one that matches your setup before moving on to the actual configuration steps.
- Wi-Fi proxy settings: It's a built-in Android option found under a Wi-Fi network's advanced settings, where you enter a proxy host and port. The setting is tied to that Wi-Fi profile, so the proxy routes traffic only while you're on that network. Switch to a different Wi-Fi or to mobile data, and traffic goes out unproxied until you reconnect.
- Mobile data and APN settings: This path is less beginner-friendly because APN changes can break your mobile connection, and many carriers lock or limit these settings. We wouldn't recommend going this route unless you've checked with your mobile operator first and know exactly which fields are safe to edit.
- Per-app proxy tools: These are apps that use Android's VPN service API to capture traffic from selected apps and route it through a proxy. Unlike Android's native Wi-Fi proxy, they handle authentication internally, support SOCKS5, and work on both Wi-Fi and mobile data. The tradeoff is that the app sees your traffic before it reaches the proxy, so it's worth sticking to established options. Examples of these are SocksDroid and Shadowrocket.
How to set up a proxy on Android?
To set up a proxy on Android, first make sure you have a proxy from a trusted provider ready. You can use residential, datacenter proxy, ISP, and mobile proxies. It’s up to you which one best suits your needs.
Once you have that ready, the setup process will become straightforward. Here are the steps you need to follow:
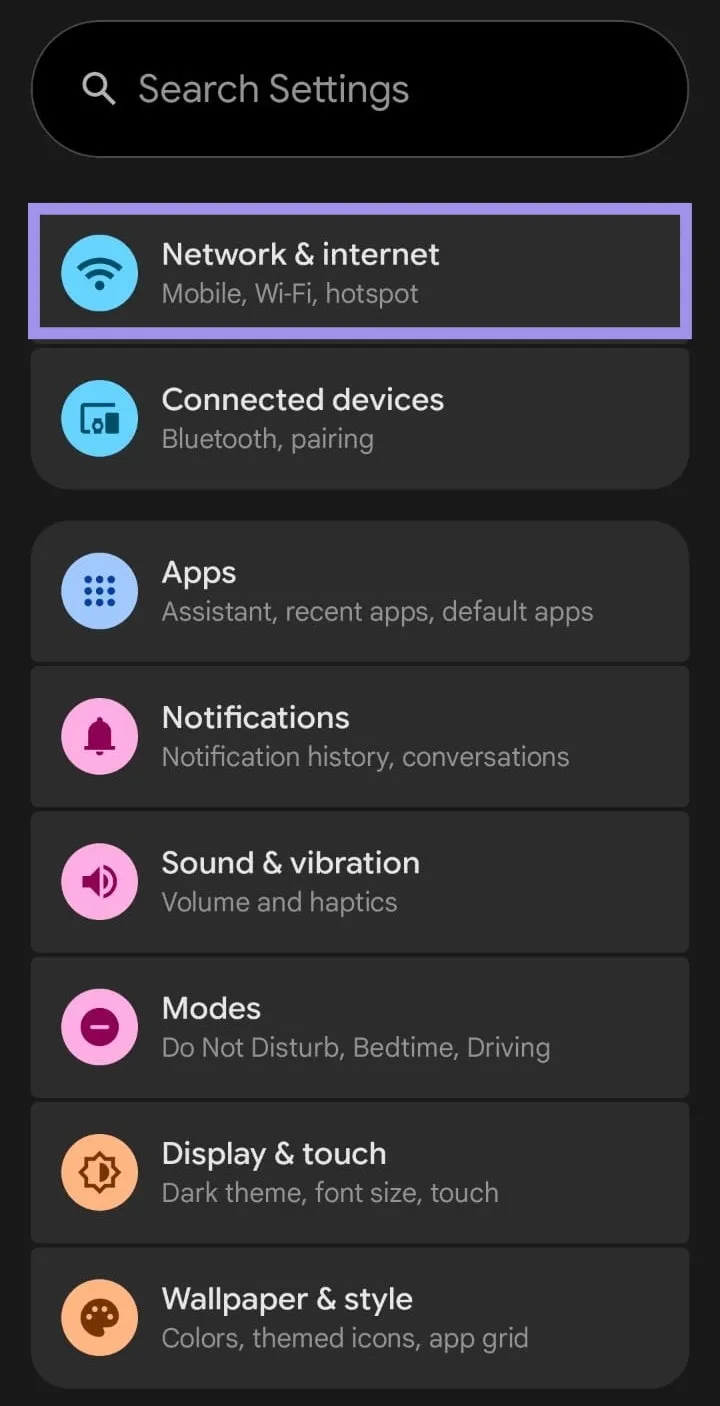
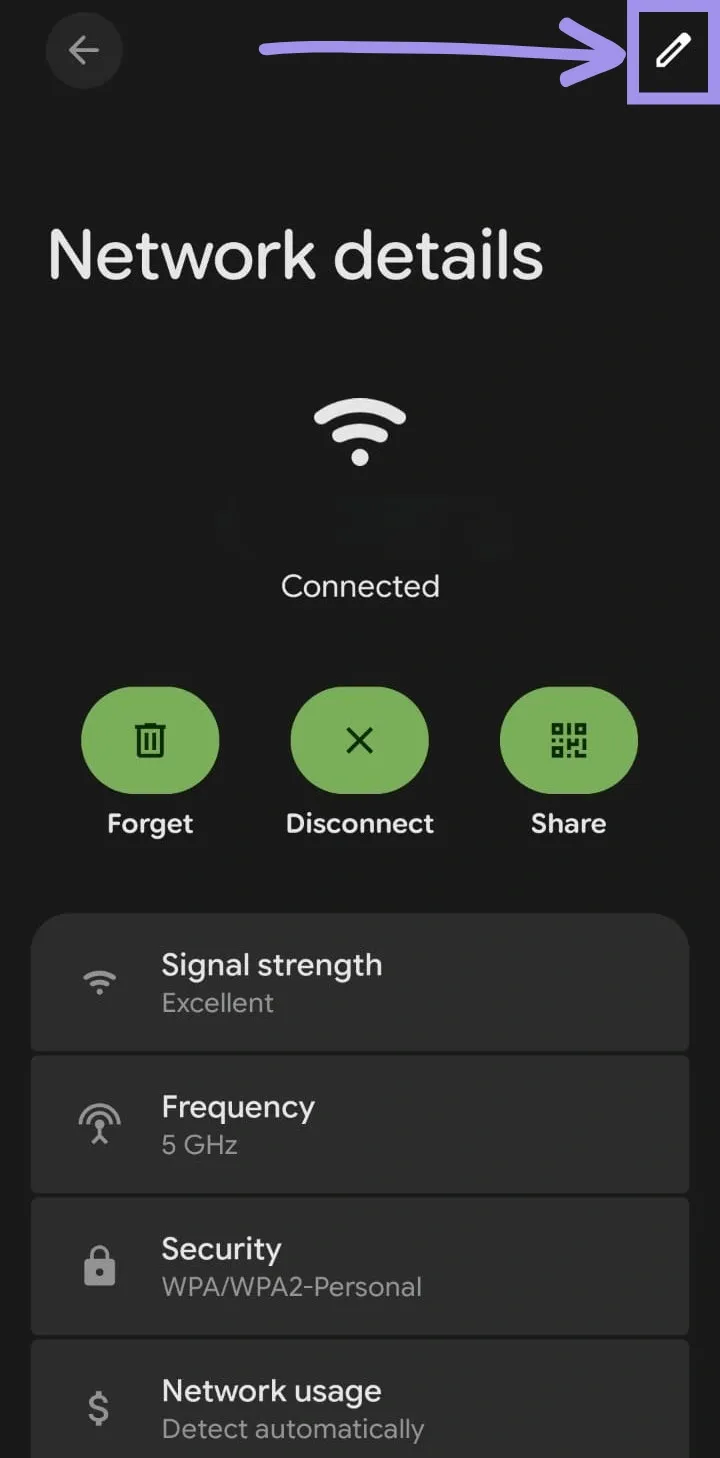
1. Open Settings and tap Network & Internet.
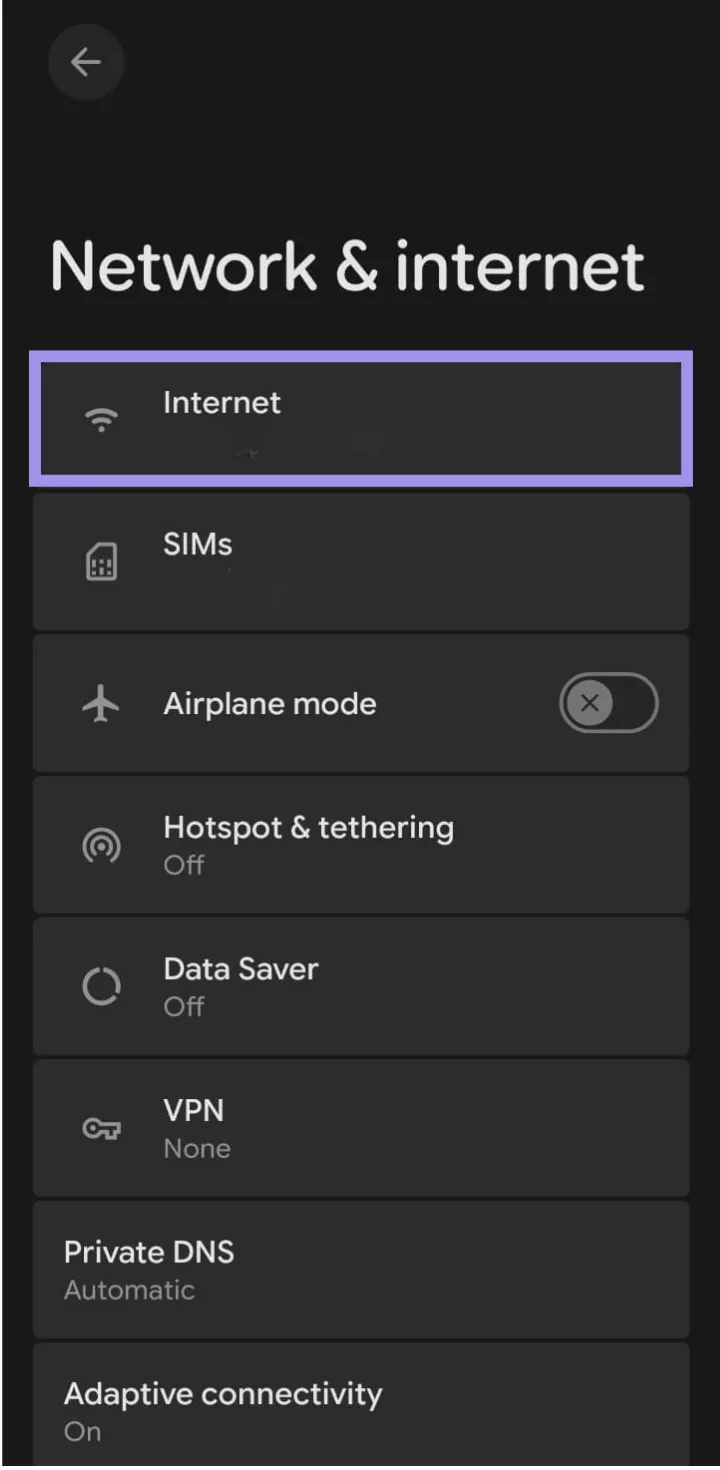
2. Look for Internet and tap on it.
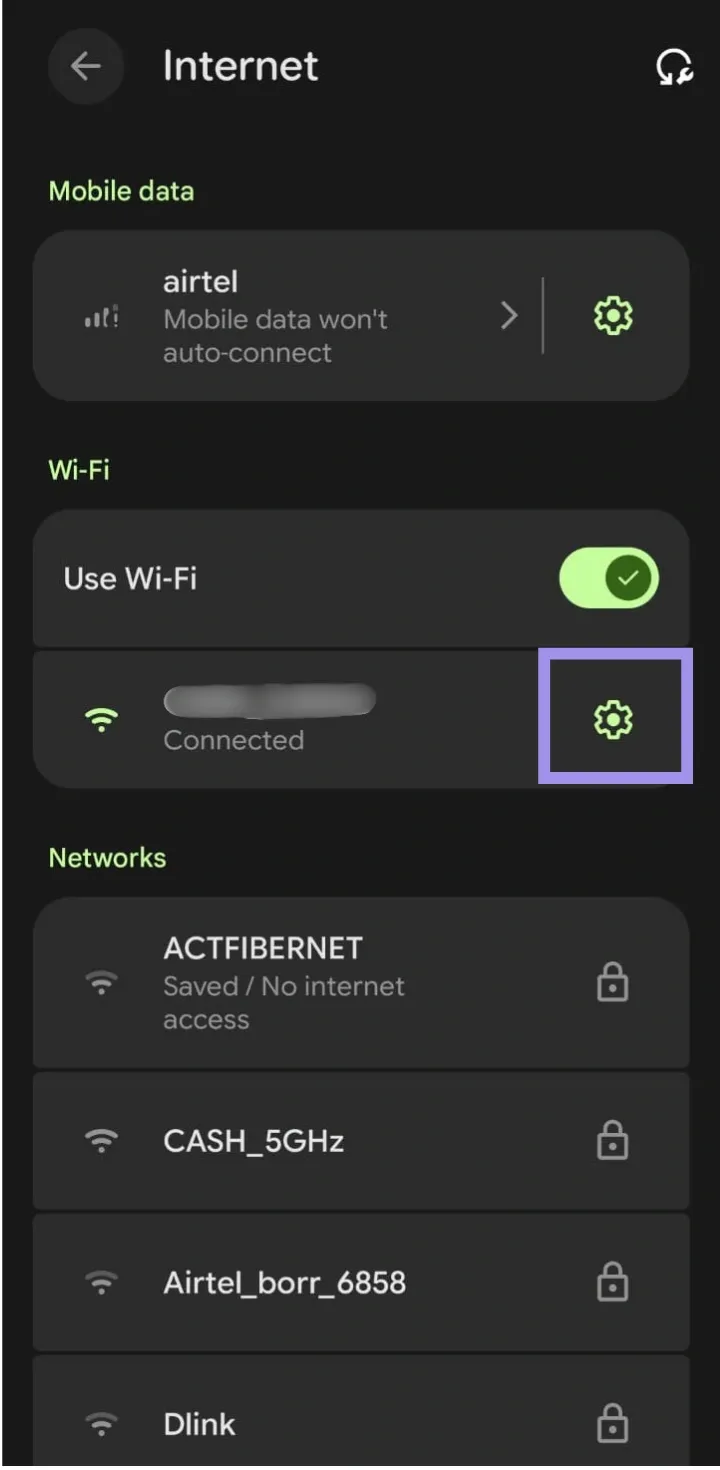
3. After that, modify your network by tapping the gear icon next to it.
4. You’ll see additional details about your network. Just ignore that and tap the edit icon. Typically, it appears in the top-right corner of your screen.
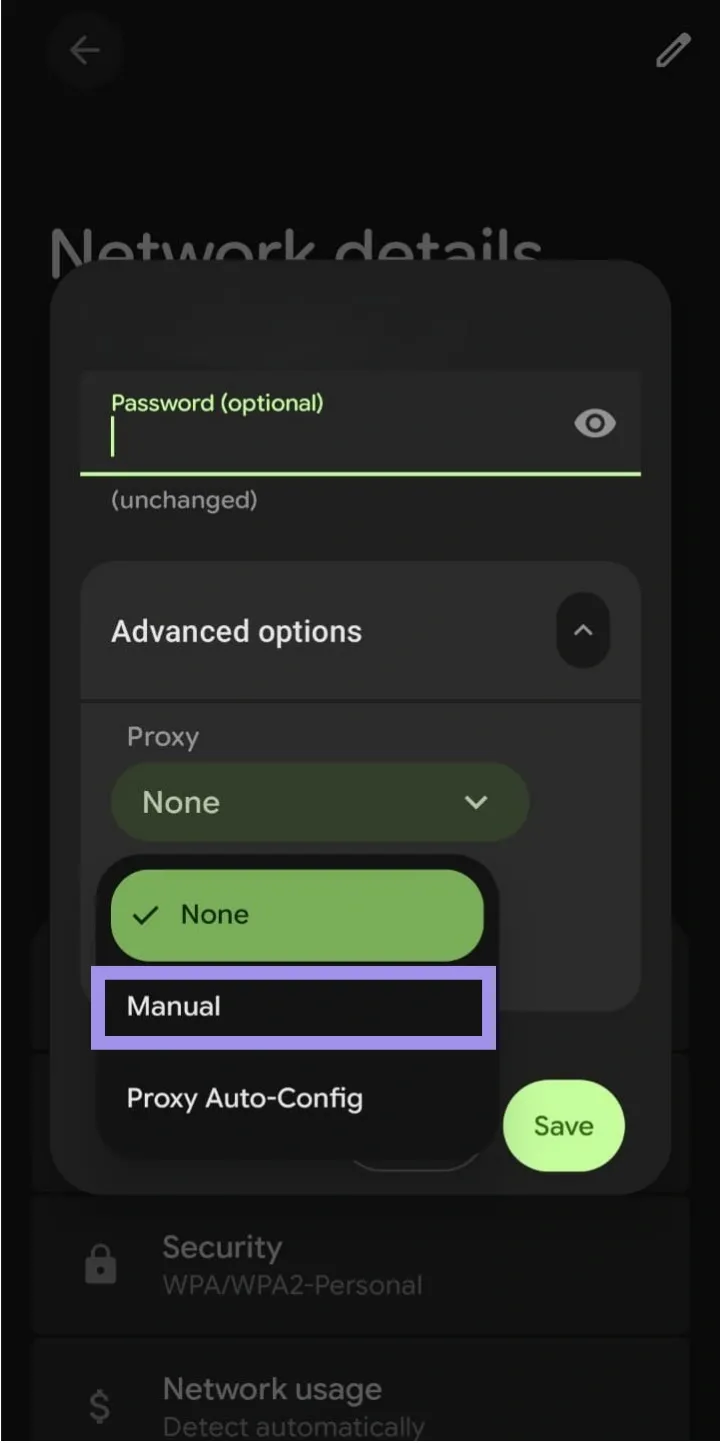
5. Tap on Advanced Options, and under proxy, you’ll usually see two options: Manual and Proxy-Auto-Config. Set it to manual. Here’s a breakdown of both options.
- Manual: Enter the hostname and port. Best for a fixed proxy endpoint.
- PAC: You enter a PAC URL. The script decides when to use a proxy vs direct connection (useful for selective routing).
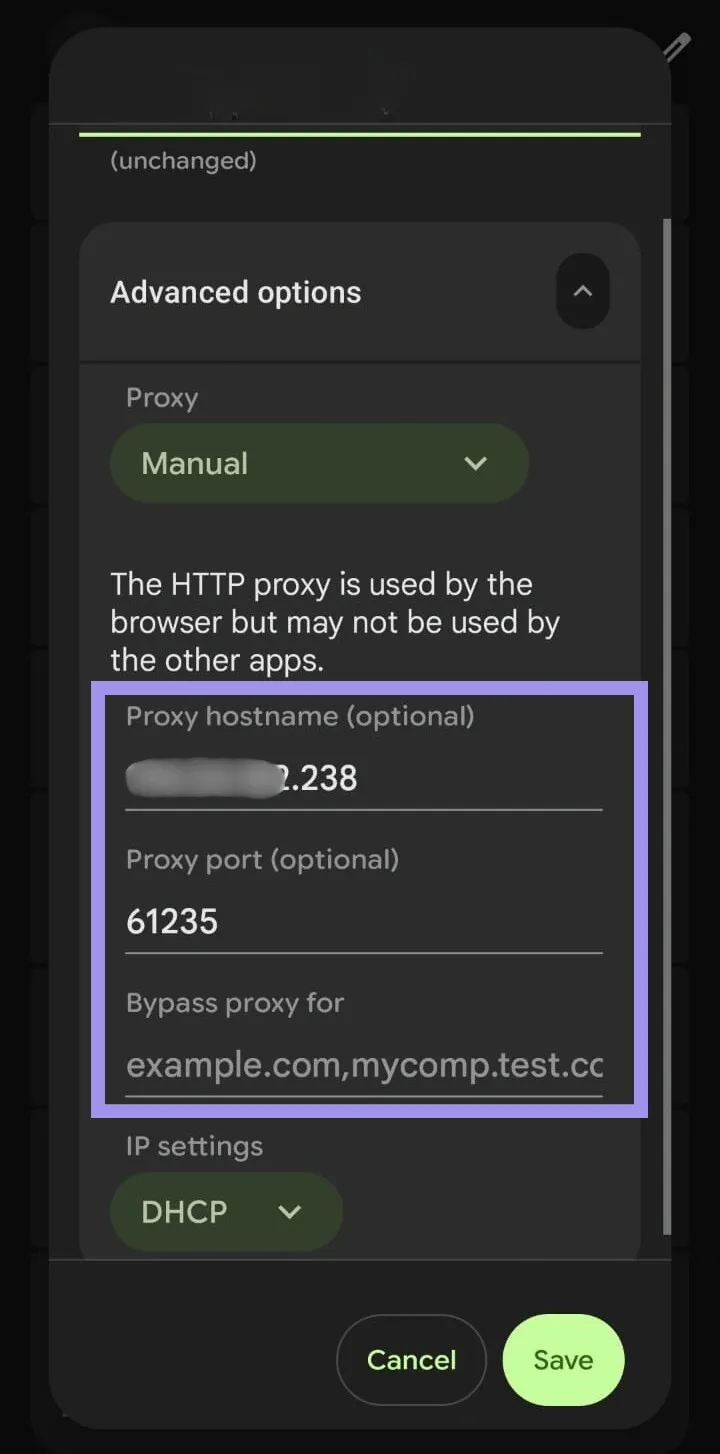
6. Enter your Proxy hostname and Proxy port in the respective fields. The hostname may look like a domain or IP address, while the port is usually a number.
Note: You’ll also see a Bypass proxy for the field. This is optional. You only need to use it if there are specific websites or domains you don’t want to route through the proxy. If you don’t need any exclusions, you can leave it blank.
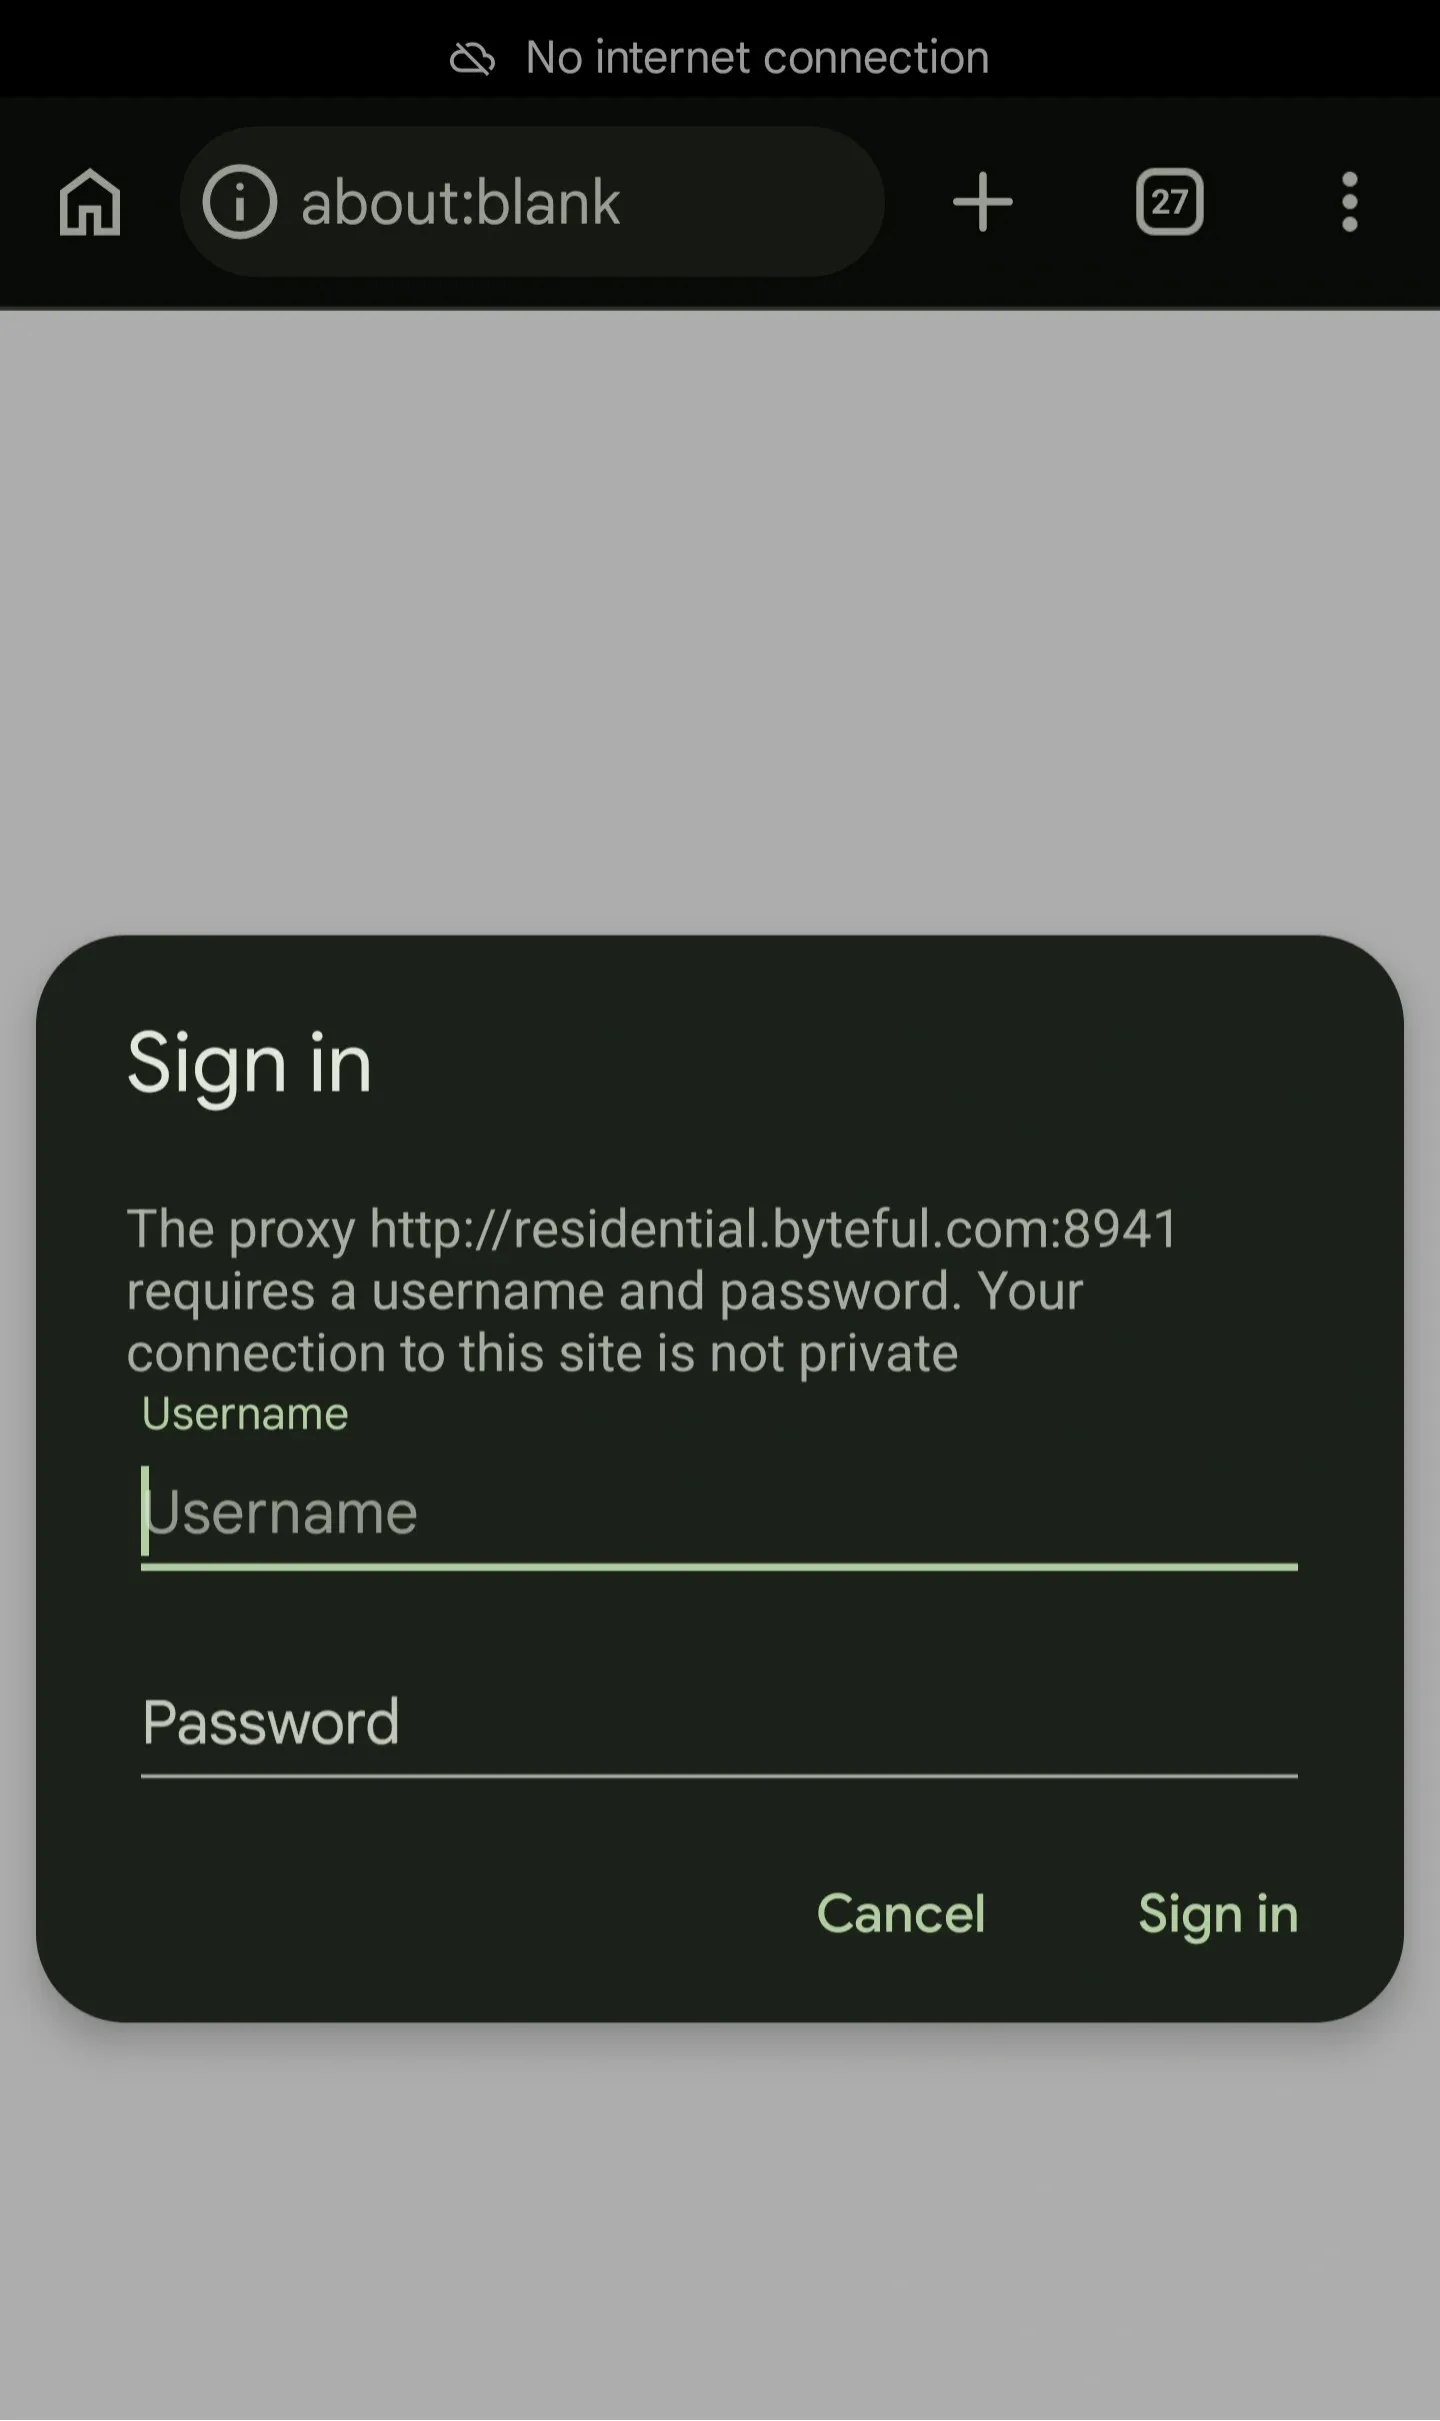
7. Once you’ve added the proxy hostname and port, tap Save. If your proxy requires credentials, some Android devices show a login prompt. Enter your username and password, then tap Sign in.
8. If the page loads normally after signing in, your proxy is working. For added verification, you can use a free tool like whatismyip.com to confirm that your IP address has changed.
Meanwhile, if the prompt loops or browsing breaks, it’s often because proxy auth handling varies by device/app. Unlike iOS, proxy credentials are usually handled more smoothly through the Wi-Fi proxy settings.
But on Android, the native proxy setup is built around the proxy host and port. It doesn’t always handle username and password authentication reliably. In that case, you’ll have to consider another approach to address the issue. And that’s what we’ll cover in the next section.
Fix proxy authentication issue on Android
The common fix is to use IP whitelisting. Basically, it’s an authentication mechanism that grants access to the proxy service based on your IP address rather than requiring login credentials.
In other words, instead of asking Android to pass a username and password, your proxy provider checks your current public IP address. If that IP is on your whitelist, the proxy allows the connection. But if not, or the request comes from an IP outside the whitelist, it gets rejected.
This works well on Android because it skips the part where authentication usually fails. Once your IP is whitelisted, you only need to enter the proxy host and port in your Android Wi-Fi settings.
Now, to give you a general idea of how to set up IP whitelisting, below are the steps you can follow when doing it through our Byteful dashboard. However, please note that some steps may vary depending on your proxy provider.
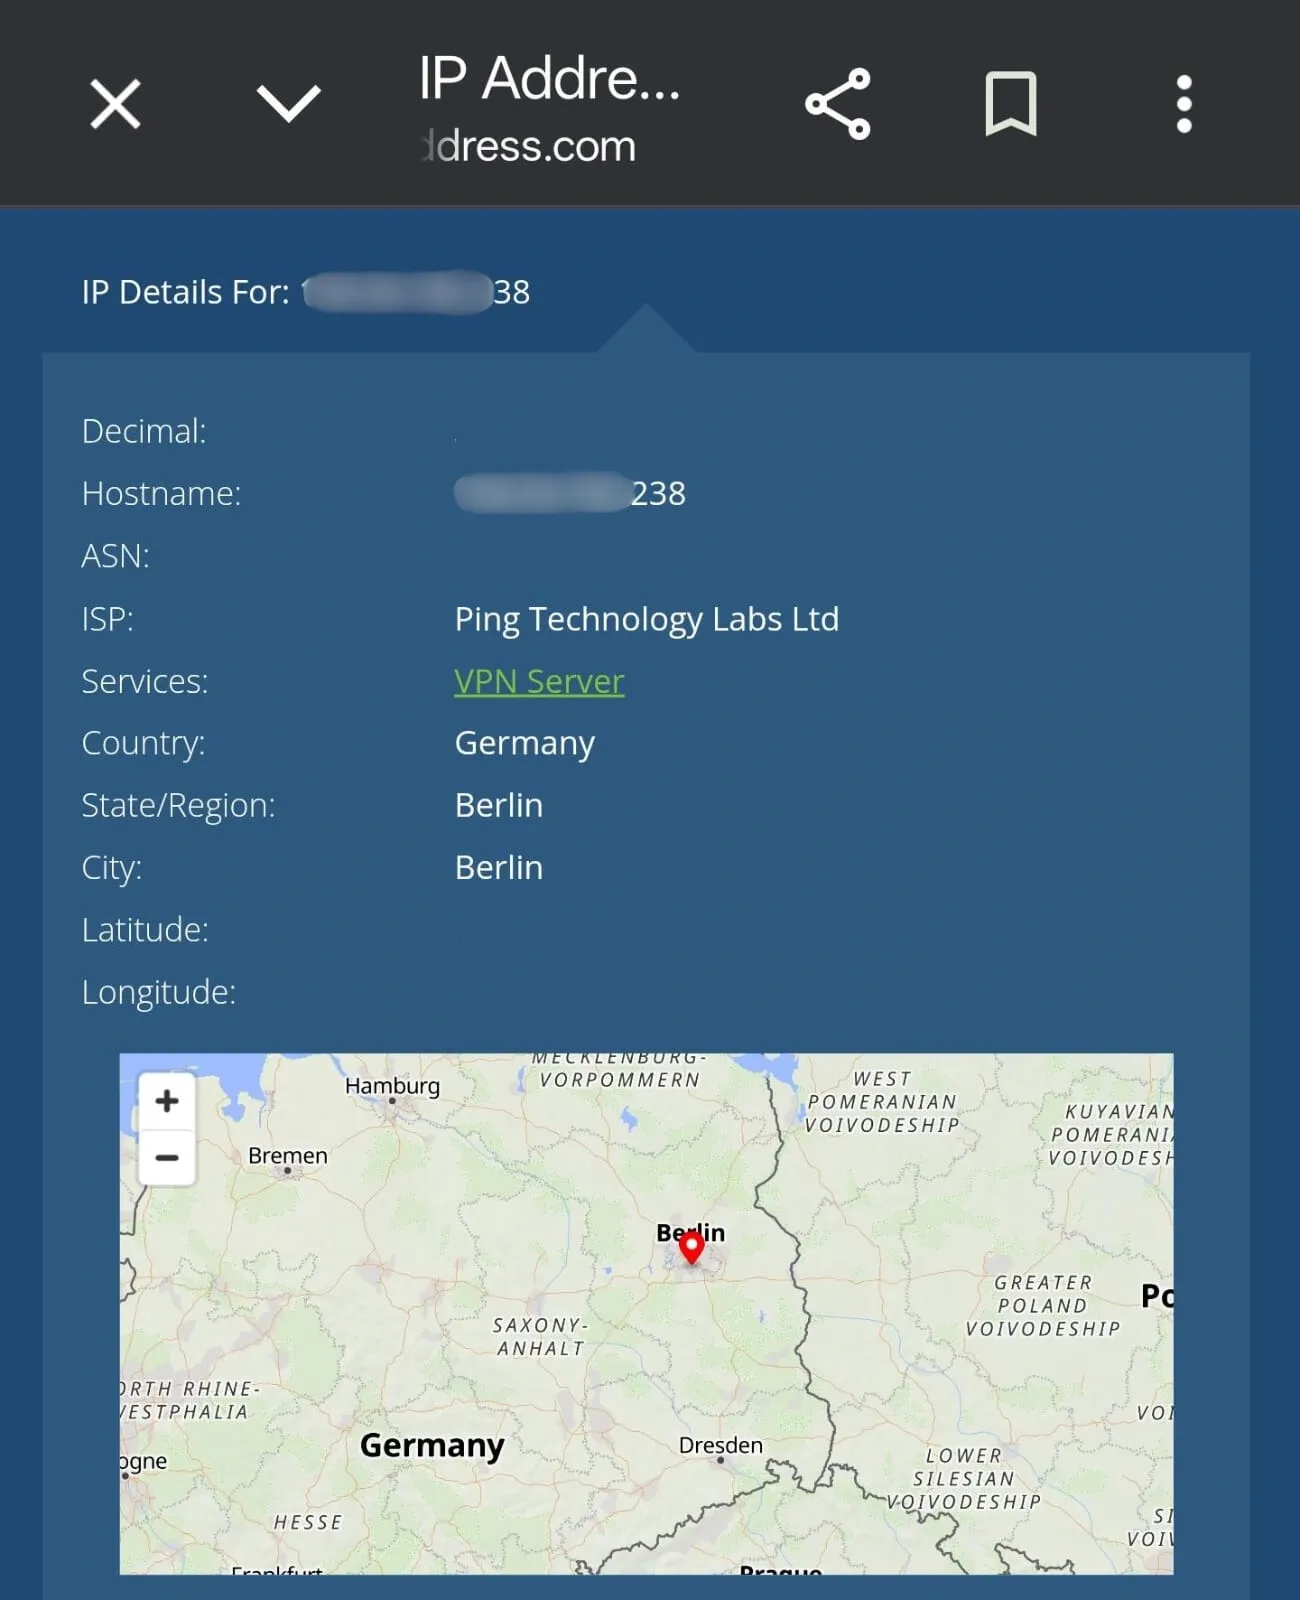
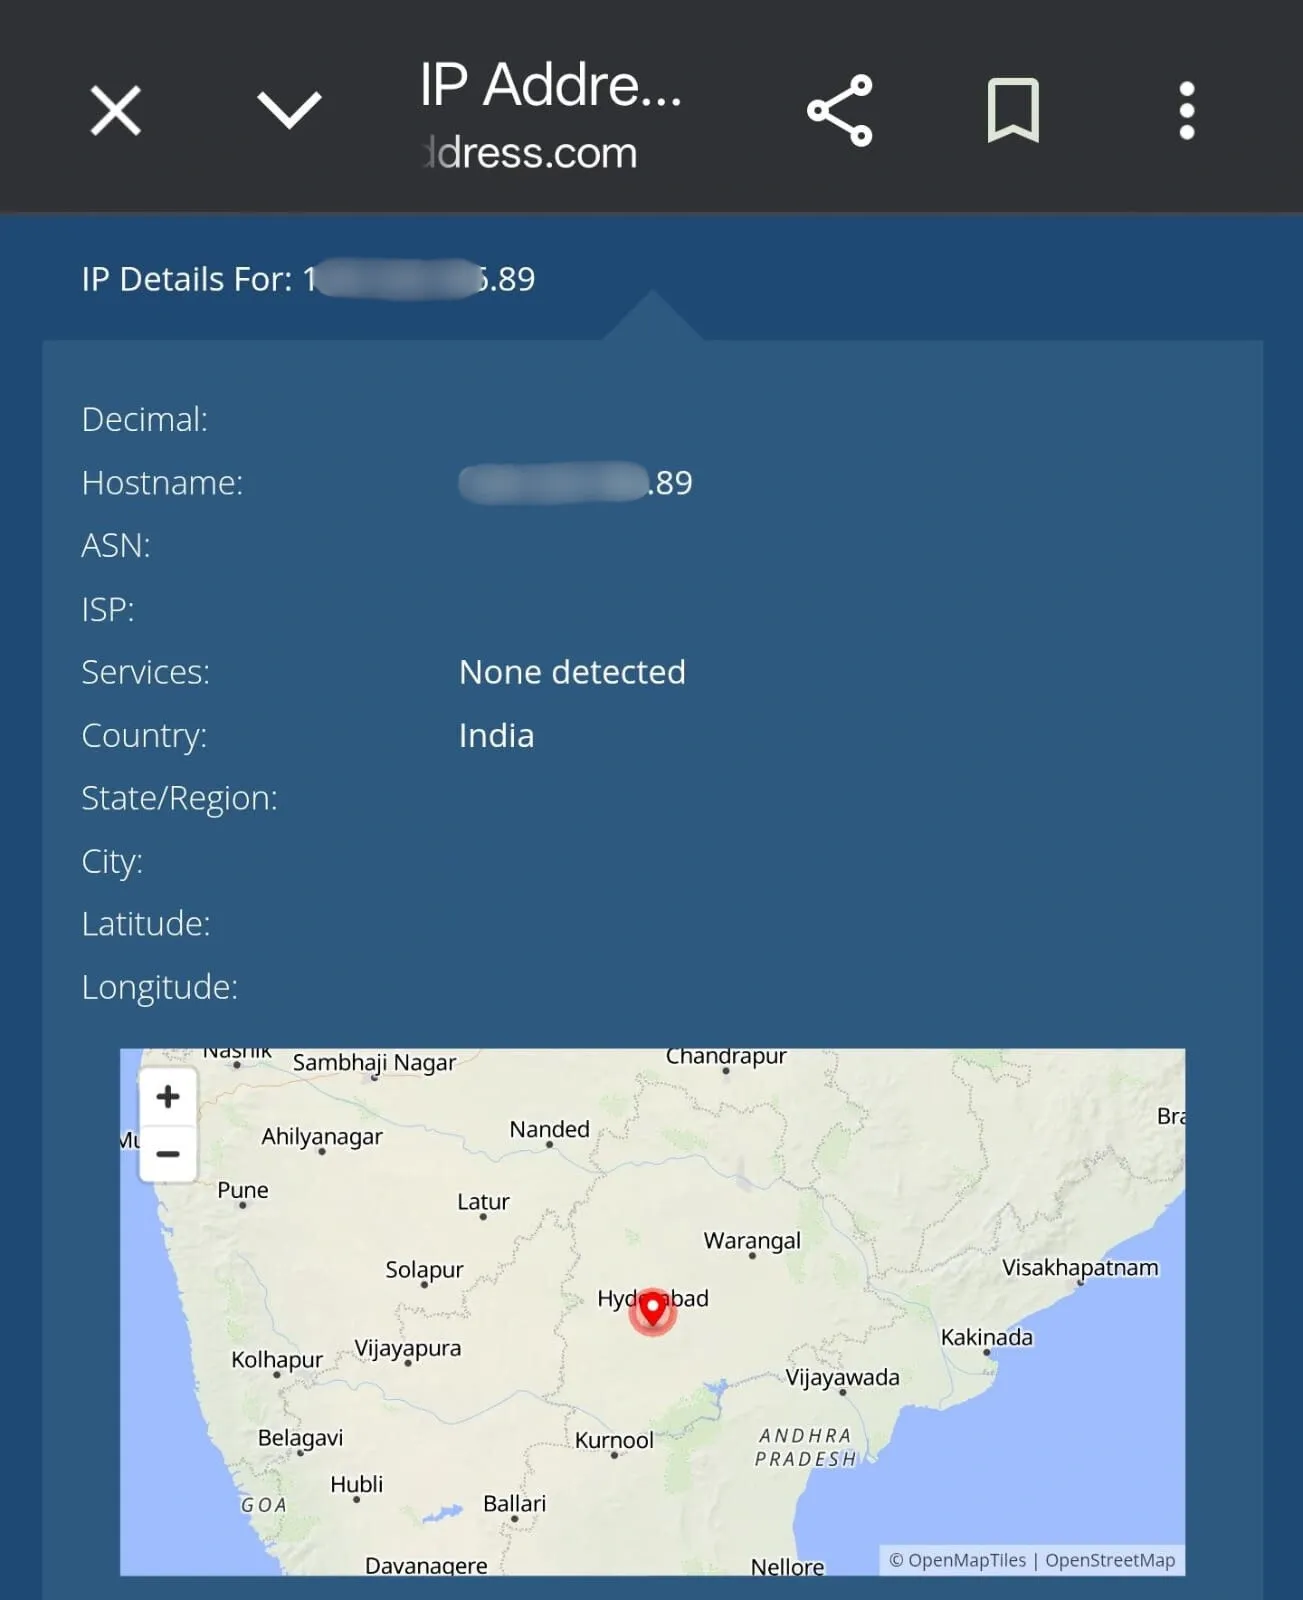
1. You’ll first need to whitelist your public IP address. To easily find that IP, you can use free tools like whatismyip. Open it while connected to the same Wi-Fi network you’ll use on Android. Usually, you’ll automatically see your public IPv4 address shown on the page. Just copy your IP and proceed to the next step.
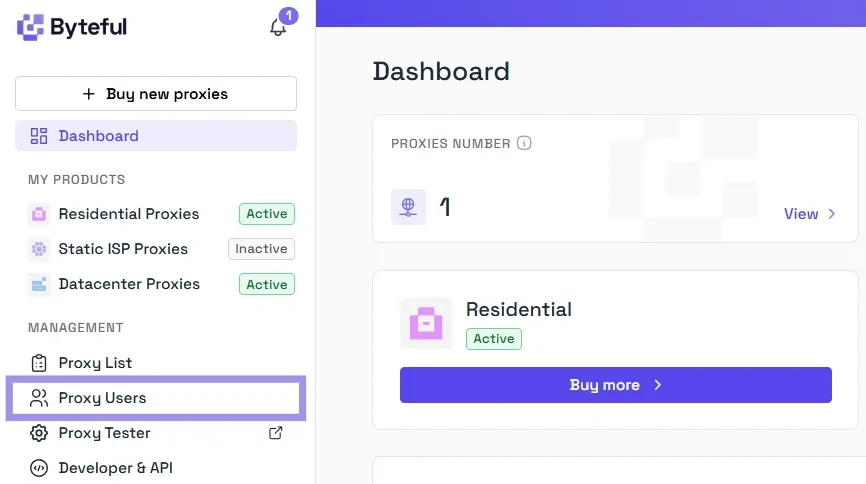
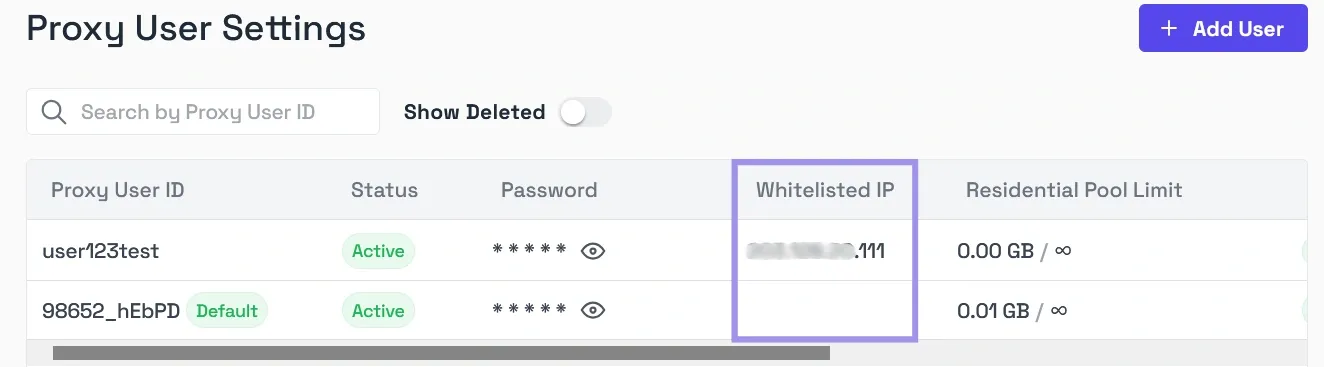
2. After that, log in to your Byteful dashboard, then click Proxy Users in the left sidebar.
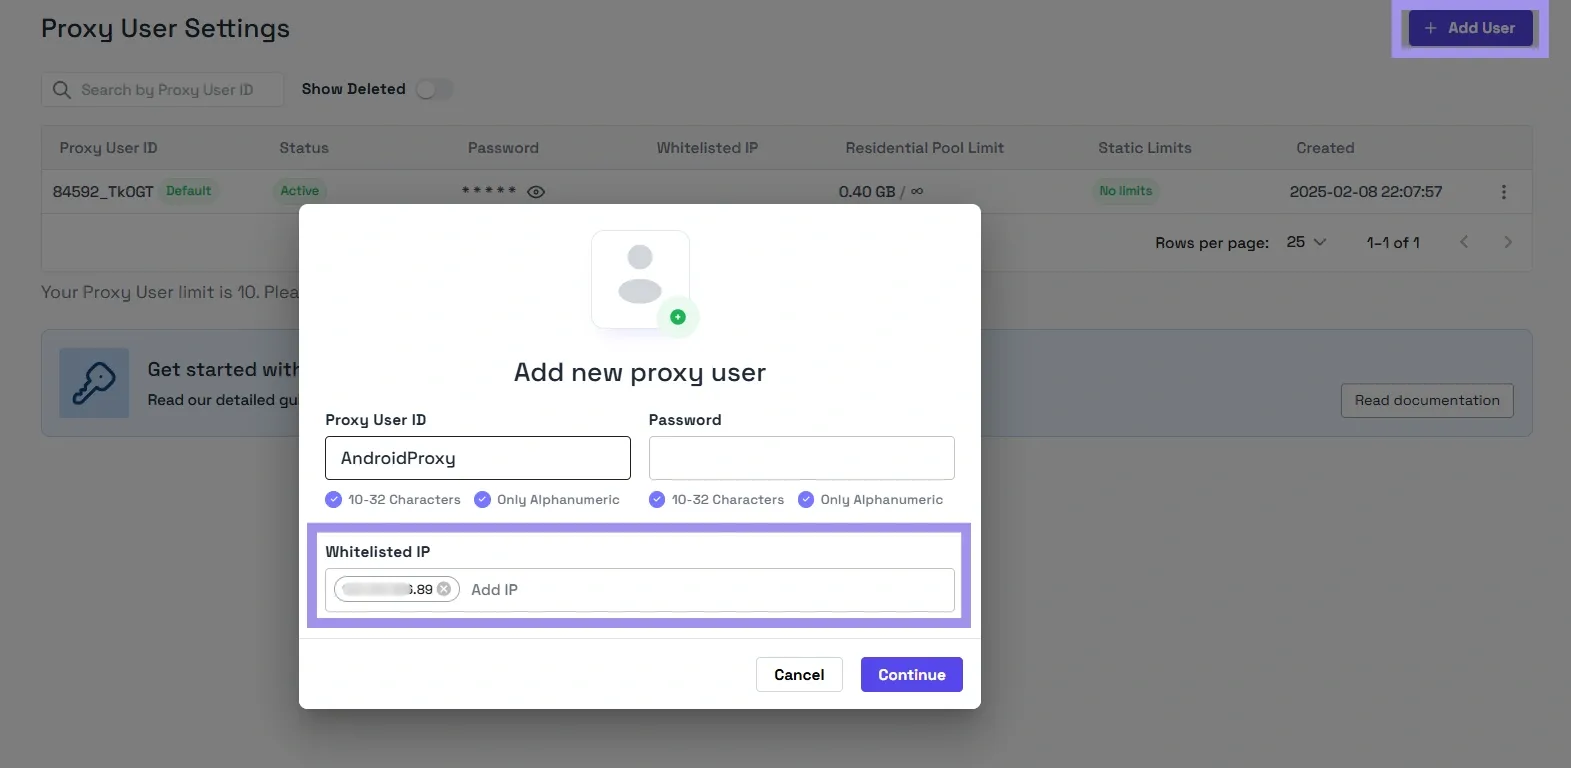
3. Once you’re inside Proxy User Settings, you can either add a new user with a whitelisted IP address or whitelist the IP address for an existing user.

4. To whitelist an IP address, paste your public IP address into the whitelisted IP field, press Enter, then click Confirm to save. As long as the IP isn't already tied to another proxy or user on the platform, it will be added to the whitelist without any issue.
5. Your public IP is now whitelisted, and you can use the proxies without login credentials. The dashboard also shows the whitelisted IPs across all your users in one view.
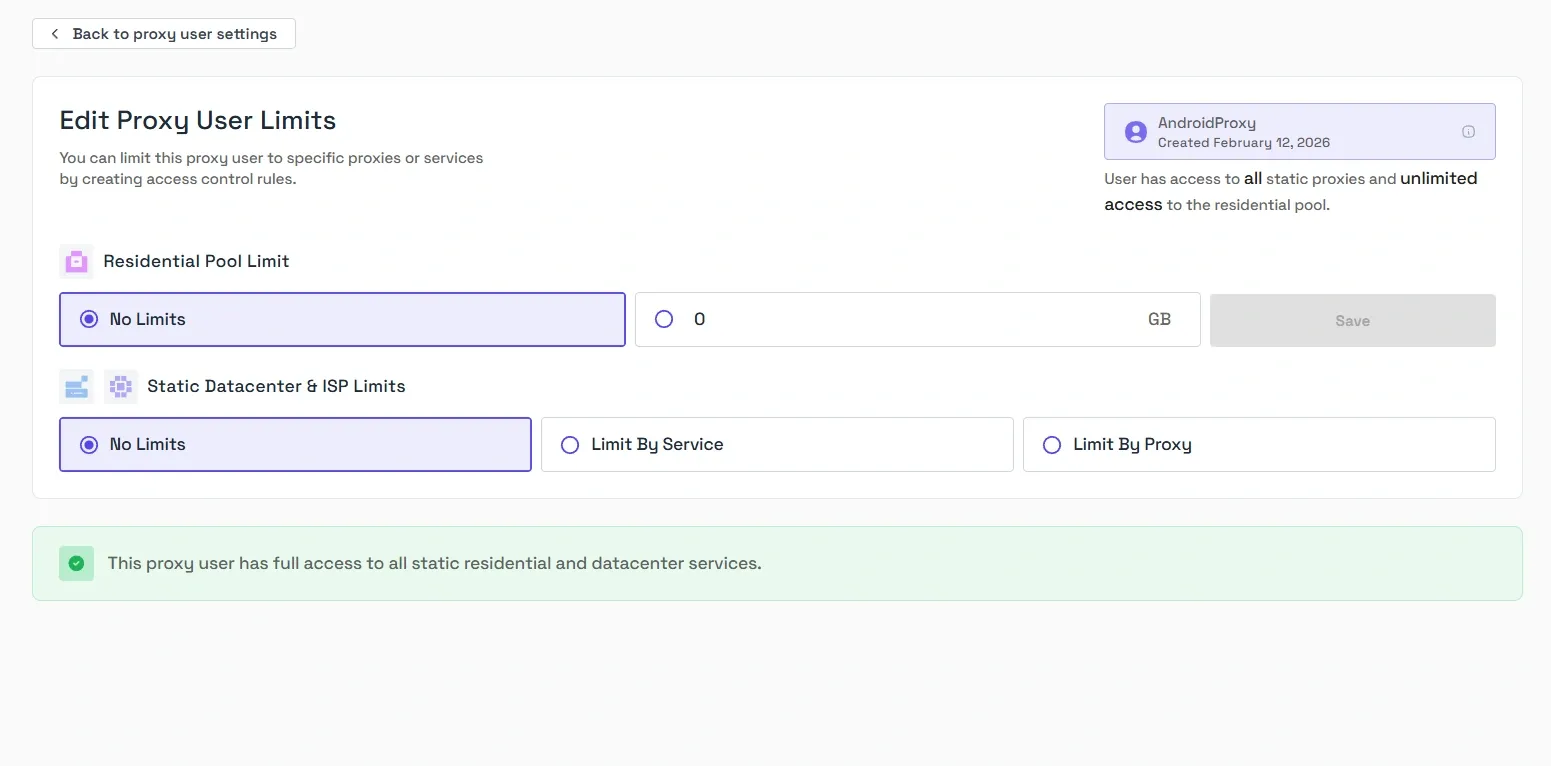
You can also set Access Control List (ACL) rules on your proxy users to limit what they can reach through the Edit Limits option. Residential proxy pool access can be capped by bandwidth.
For ISP and datacenter proxies, you can scope access by service and by individual proxy. ACL rules give you fine-grained control over how each proxy user interacts with the proxies and which proxies on your account they can reach.
What if your proxy provider doesn’t offer whitelisting?
If that’s the case, you can skip Android's native settings and use a per-app proxy app that handles authentication internally. The two options you can use are SocksDroid and Shadowrocket:
Shadowrocket
It’s a paid client that supports HTTP, HTTPS, and SOCKS5 with authentication. Originally an iOS-only app, but a clone built by a different developer is available on the Play Store for Android.
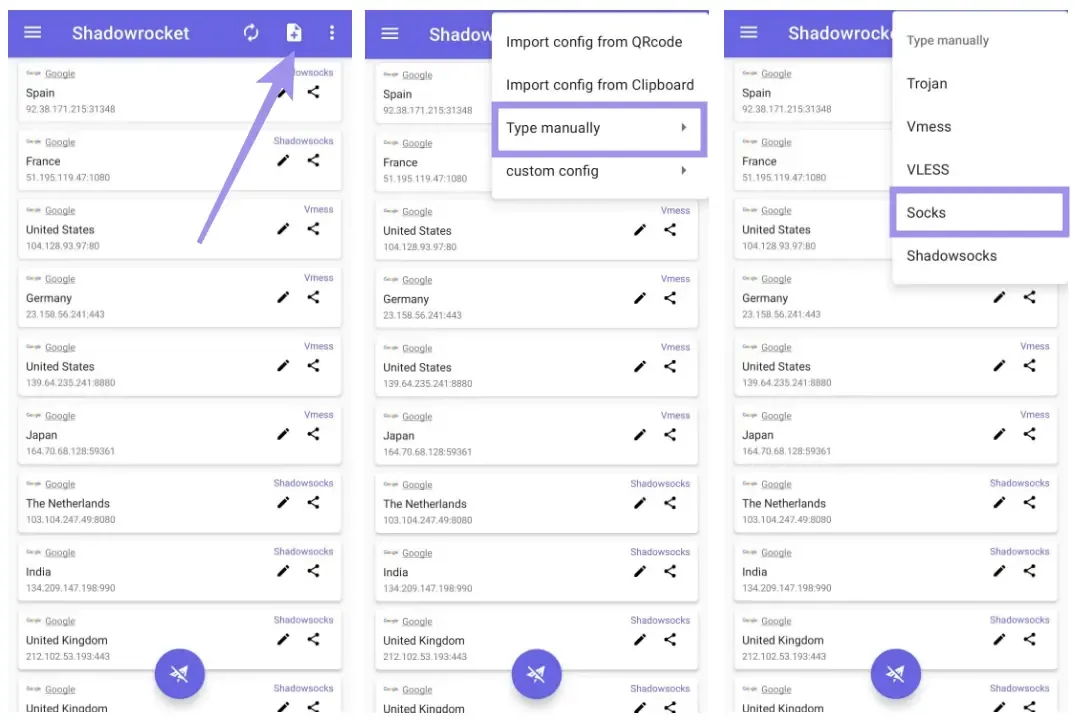
However, the clone covers the basics but doesn't support HTTP or HTTPS. The available protocols are Shadowsocks, VMess, VLESS, Trojan, and SOCKS. Here's how to set it up:
1. Generate a SOCKS5 proxy from your provider (host, port, username, password), since HTTP and HTTPS aren't supported on the Android version.
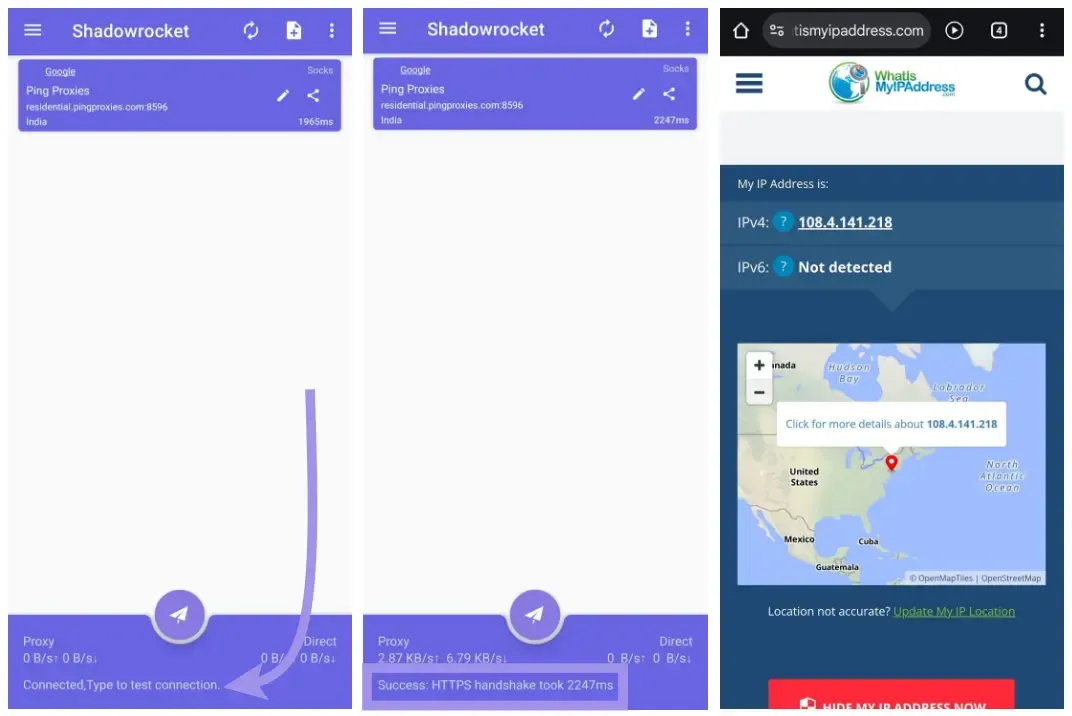
2. Open Shadowrocket and tap the Add page icon in the top-right corner. Tap Type manually and choose your proxy protocol.
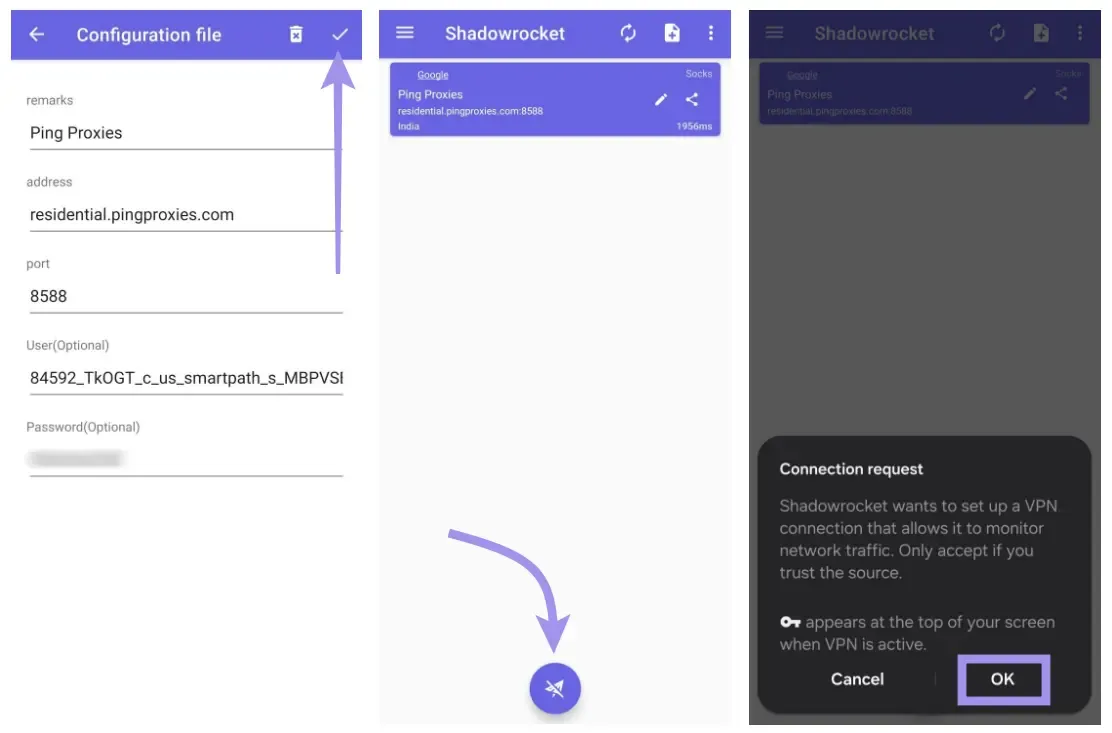
3. Fill in the address, port, username, and password. Once you’re done, tap the checkmark icon in the top-right corner to save changes. Then tap the paper plane button. When prompted for permission, tap OK.
4. Verify your connection by tapping the proxy entry. If it's configured correctly, the status will update to Success. You can also visit an IP-checking site like whatismyip.com to confirm the IP and location match your proxy.
For iOS setup, routing options, and a fuller walkthrough, see our Shadowrocket configuration guide.
SocksDroid
It’s a free, open-source app that creates a local VPN interface and tunnels traffic through a SOCKS5 proxy. Here’s how to set it up:
1. Generate a proxy from your provider (host, port, username, password). Also worth noting that SocksDroid isn't on the Play Store, so download the APK only from the official source and side-load it. Hence, be careful when side-loading APKs, as installing apps outside the Play Store can carry security risks.
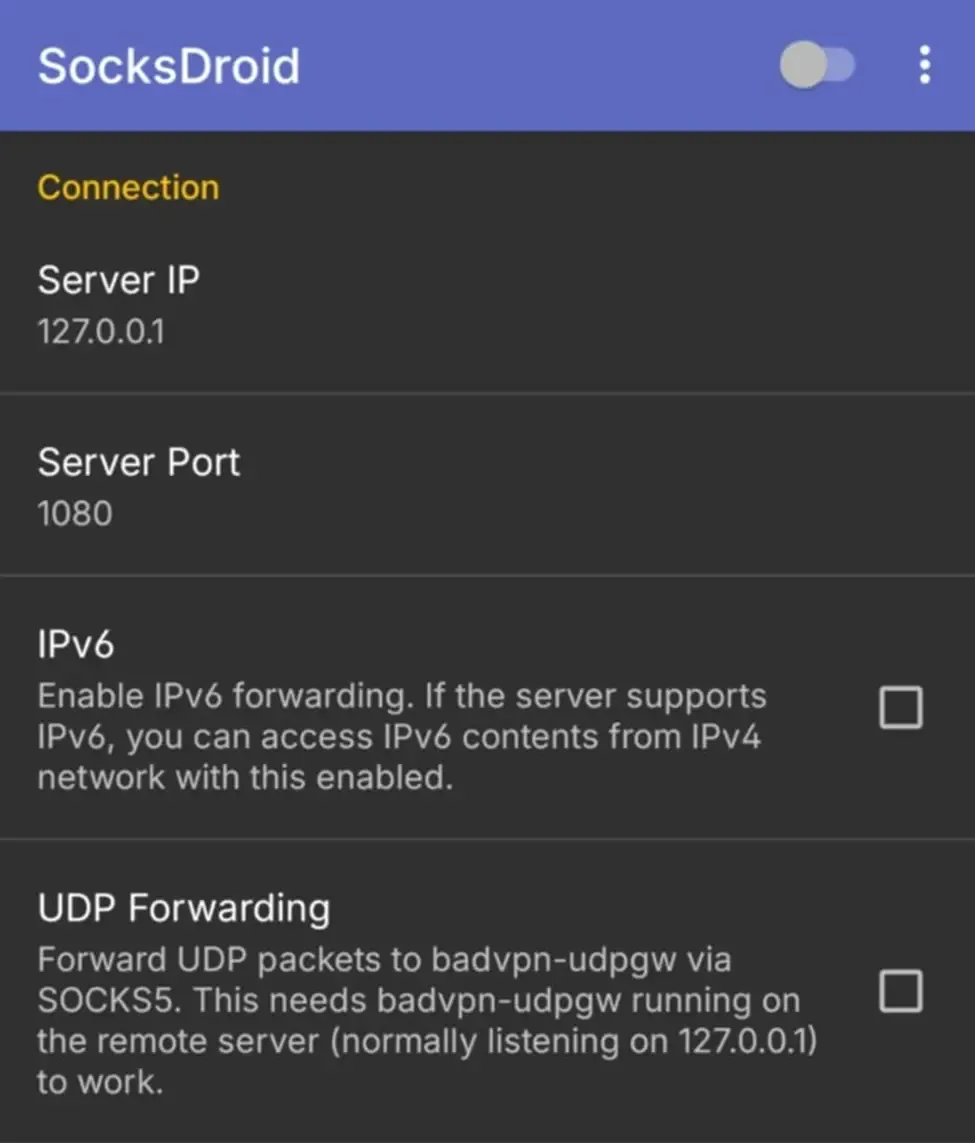
2. After that, open SocksDroid and go to the proxy setup section. Enter the server IP and port in the proxy configuration fields.
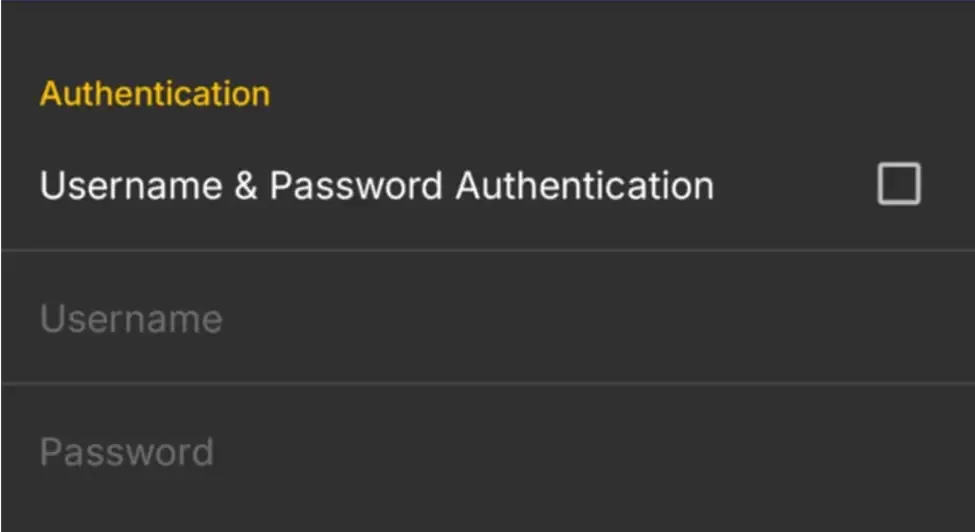
3. Toggle on authentication and enter your proxy username and password from your proxy provider.
4. Save the profile. To manage or switch between multiple proxies, tap the three dots in the top right and select Add Profile.

5. Verify your connection. Open a browser, visit an IP-checking site (like whatismyip), and confirm the IP and location match your proxy. If it fails, double-check the hostname, port, and credentials, and make sure you're not running a VPN at the same time, since the two can conflict and cause traffic to be misrouted.
For a deeper walkthrough covering proxy generation on the Byteful dashboard and saving multiple connection profiles, see our full SocksDroid guide for Android.
Troubleshooting Android proxy setup
Even with the right settings, things break. Here are the failures we see most often and how to read them.
Proxy is set, but traffic is not changing
Your IP test still shows your real address. If that happens, there are two likely causes. One, the app you’re testing with is ignoring the system proxy. Two, your proxy configuration isn’t properly configured.
To fix, try to open a different browser. After that, run Byteful proxy tester and confirm the exit IP. If the test passes in the browser but fails in your target app, then most likely that app is bypassing the proxy. And you need a per-app tool.
Also, you can go back to your Android proxy settings and double-check if your IP and port match what your proxy provider gives. A simple typo on it may also cause some errors, so make sure that you have added the correct inputs.
If you want to learn more about proxy errors, we have a guide that covers that in detail as well. Reading it may give you an idea of what they are and how to address them if you encounter similar issues moving forward.
Mobile data stops working after setup
While APN settings cover proxy details, they also determine how your phone connects to mobile data, MMS, VoLTE, and Wi-Fi calling. That means an incorrect edit can affect any of those services. If you edited your APN settings and your mobile data stopped working, reset them to the default settings.
On most Android phones, go to:
Settings > Mobile Network > Access Point Names > Reset to default
The exact menu name may vary depending on your device. If mobile data still doesn't work after the reset, contact your carrier before making any further changes, since some APN values are network-specific and can only be restored on their end.
App traffic does not follow the proxy
Usually, this issue is common as Android’s native Wi-Fi proxy settings don’t force every app to use the proxy.
Some apps respect system proxy settings, while others use their own networking behavior and ignore them. Android’s own documentation describes HTTP proxies as a hint rather than an enforced rule.
If a specific app is not following the proxy, use a per-app proxy tool or a VPN-style proxy app that routes traffic more directly.
Free proxies vs paid proxies on Android
Free proxies are tempting for a quick test, but on Android, they rarely support stable authentication, often die mid-session, and many are run by people harvesting credentials.
We have written about why ethical proxy sourcing matters and what separates a trustworthy free proxy server from a risky one. The short version: free is fine for one-off curiosity, paid is the right call for anything you actually care about.
How to choose the right proxy for Android
Picking the right type is mostly about matching the proxy to what you are doing.
- Task sensitivity: If you are accessing a banking app, a social account that matters, or anything tied to your real identity. Residential or static residential proxies are the right call as it uses IPs tied to a household that appear more like a normal user instead of a bot.
- Session behavior: Apps that log you in and expect you to stay on the same IP for the session need a sticky IP. Static residential proxies hold the same IP for as long as you need. Rotating residential proxies changes the IP per request, which is what you want for tasks that should look like many different users rather than one persistent session.
- Trust, speed, and cost: Datacenter IPs are fast and inexpensive, but easier for sites to detect. Residential IPs are slower and pricier but blend in with normal users. Before buying any pool, it is worth checking the proxy IP reputation. A clean IP that costs more is almost always cheaper than a flagged IP that costs less.