
Axios Proxy Guide: How to Use Proxies with Axios in Node.js

Using proxies with Axios in Node.js helps you distribute your requests across thousands of IPs in different locations. This reduces IP-based throttling, supports location-specific testing, and keeps the primary IP reputation intact.
Therefore, we have created this guide that covers several important aspects of proxies for Axios, including basic/advanced configurations, common errors, and their overall role.
Let’s jump right into it.
How Axios proxying works in Node.js
Depending on the level of complexity, there are multiple ways to plug in proxies with Axios in Node.js.
The simplest method is to use a proxy object, which redirects requests to a proxy rather than the target server without any additional configuration. You can accomplish this by passing on host, port, and protocol parameters within the request. Moreover, one can include an auth object for basic authentication.
However, this method of using a proxy object has some limitations. First, this will only have you use either the HTTP or HTTPS protocol.
Additionally, the native Axios proxy object has historically been unreliable if you want to access an HTTPS URL with an HTTP proxy. This issue even persists today, and developers suggest implementing native support for proxy tunneling. Similarly, there are reported GitHub issues on keep-alive connections (now closed), where users got a socket hang-up error for subsequent requests.
Conclusively, it’s recommended to use an external agent for advanced setups, including SOCKS support, proxy tunneling, and connection pooling.
Basic Axios Proxy Setup
In this section, we will use the Axios proxy object to route requests, with and without authentication.
Single proxy with host and port
This is the most fundamental setup in which we will demonstrate how to use an HTTP proxy to route all requests. Since Axios natively supports HTTP/HTTPS, we will use its proxy object, configured with the protocol, proxy IP, and port. Here’s the snippet:
const axios = require('axios');
async function testBasicProxy() {
  try {
    const response = await axios.get('https://httpbin.org/ip', {
      proxy: {
        protocol: 'http',
        host: '141.98.153.86',
        port: 80
      },
      timeout: 10000
    });

    console.log('Response from Proxy:', response.data);
  } catch (error) {
    console.error('Proxy Error:', error.message);
  }
}

testBasicProxy();
We recommend adjusting the timeout based on the proxy. For ex., if you’re using a free proxy server, consider increasing the timeouts, since these servers are often overwhelmed with thousands of users at any given time.
Finally, to confirm this works, we have to hit httpbin, which returns the source URL. If the proxy works as intended, it should echo the proxy URL, as shown in the following image:
Username and password authentication
For private proxies, you must add login credentials within for access. If not, you will get a 407 Proxy Authentication Required error. The modified code snippet, including the auth object, looks like this:
const axios = require('axios');
async function testBasicProxy() {
  try {
    const response = await axios.get('https://httpbin.org/ip', {
      proxy: {
        protocol: 'http',
        host: '23.95.150.145',
        port: 6114,
        auth: {
          username: 'your_username',
          password: 'your_password'
        }
      },
            timeout: 10000
    });

    console.log('Response from Proxy:', response.data);
  } catch (error) {
    if (error.response && error.response.status === 407) {
      console.error('Proxy Error: Authentication failed (407 Proxy Authentication Required).');
    } else {
      console.error('Proxy Error:', error.message);
    }
  }
}

testBasicProxy();

Expected Output:

{ origin : ‘124.25.57.24’}
Running this script will return the proxy IP address, provided the username-password combo is correct and the server is responsive.
Advanced Axios proxy setups
There is only so much you can accomplish with the native proxy object. That’s why you might want to migrate to advanced setups that offer greater flexibility, security, performance, and protocol choice, as covered in the subsequent sections.
Environment variables and safe secret handling
Adding sensitive information, including login credentials and API keys, into the code base is similar to leaving your house keys in the door lock, which no developer wants to do.
Therefore, as a means to secure secrets, it’s advised to create a separate plain-text environment (.env) file with proxy details and load it with the dotenv package.
For example, this can be the plain text.env file:
PROXY_HOST=23.95.150.145
PROXY_PORT=6114
PROXY_USER=username
PROXY_PASS=password
And below is the snippet, added with the dotenv package:
require('dotenv').config();
const axios = require('axios');
async function safesecret() {
  const proxyConfig = {
    protocol: 'http',
    host: process.env.PROXY_HOST,
    port: parseInt(process.env.PROXY_PORT),
    auth: {
      username: process.env.PROXY_USER,
      password: process.env.PROXY_PASS
    }
  };

  try {
    const response = await axios.get('https://httpbin.org/ip', {
      proxy: proxyConfig,
      timeout: 10000
    });

    console.log('Success! Connected via:', response.data.origin);
  } catch (error) {
    console.error('Connection Failed:', error.message);
  }
}

safesecret();
Once set up, we can run the script to ensure everything is working correctly, as shown in the following image.
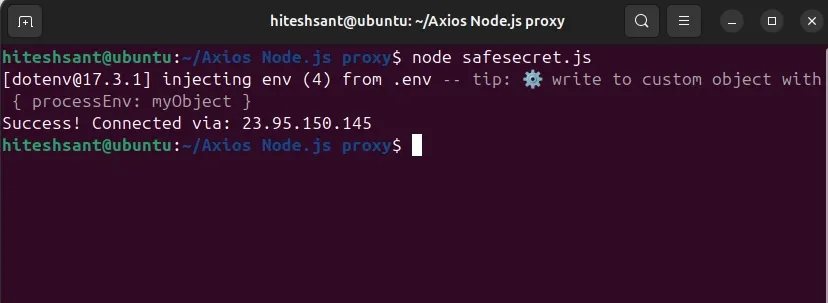
Pro tip: Take extra care when formatting proxy details, including the port, username, and password. One extra blank space, even in naming the environment file, will lead you to errors.
SOCKS5 with socks-proxy-agent
There are many reasons to use a SOCKS proxy instead of an HTTP proxy. Without delving into those specifics, we will explain how to configure a SOCKS5 agent to use SOCKS5 proxies with Axios in Node.js.
Since Axios doesn’t natively support SOCKS, we’ll begin by installing the agent:
npm install socks-proxy-agentThis agent helps the Axios talk to the socks proxy server with the following code snippet:
const axios = require('axios');
const { SocksProxyAgent } = require('socks-proxy-agent');

async function socks5proxy() {

  const host = '149.20.253.58';
  const port = '12551';

  const info = `socks5://${host}:${port}`;
  const agent = new SocksProxyAgent(info);

  console.log(`Connecting to public SOCKS5 proxy at ${host}...`);

  try {
    const response = await axios.get('https://httpbin.org/ip', {
      httpAgent: agent,
      httpsAgent: agent,
      proxy: false,
      timeout: 10000
    });

    console.log('Success! Your Proxy IP is:', response.data.origin);
  } catch (error) {
    console.error('Connection Failed:', error.message);
    console.log('Tip: Public proxies die fast. Try a different IP/Port from your list.');
  }
}

socks5proxy();
Expected output:
Success! Proxy IP: 149.20.253.58To be honest, we have tried multiple times with free SOCKS proxies, but only to end up with FAILED: connect ECONNREFUSED error.
Finally, we plugged in our own premium SOCKS proxies for this demonstration. And since our proxies are private, we had to update the code to include the auth object as indicated in the following snippet:
const axios = require('axios');
async function socks5proxy() {
const { SocksProxyAgent } = await import('socks-proxy-agent');
const host = 'residential.pingproxies.com';
const port = '8747';
const username = 'your_username';
const password = 'your_password';
const info = `socks5://${username}:${password}@${host}:${port}`;
const agent = new SocksProxyAgent(info);
try {
const response = await axios.get('https://httpbin.org/ip', {
httpAgent: agent,
httpsAgent: agent,
proxy: false,
timeout: 10000
});
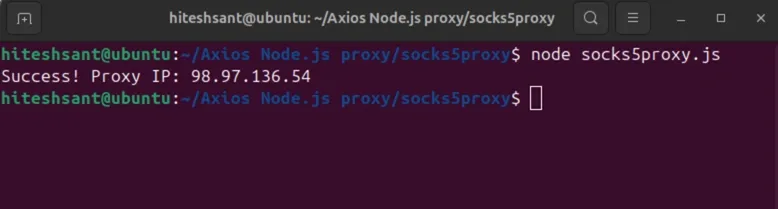
console.log('Success! Proxy IP:', response.data.origin);
} catch (error) {
console.error('Connection Failed:', error.message);
}
}
socks5proxy();
This time it worked as indicated in the subsequent image:
Reusable Axios instances, keep-alive, and connection pooling
Scaling your Node.js operations requires a strategic approach to reduce development overhead and anti-bot detection risks.
A reusable Axios instance is where you set the logic once and use it across requests. It helps avoid passing the target URL, proxy, headers, authentication, timeout, etc., with each axios call.get() call.
Here’s a sample snippet where we have defined the URL, timeout, and proxy settings as a resuableInstance and used it later on.
const axios = require('axios');
const reusableInstance = axios.create({
  baseURL: 'https://httpbin.org',
  timeout: 20000,
   proxy: {
    protocol: 'http',
    host: '45.77.56.122',
    port: 8080,
    auth: {
      username: 'your_username',
      password: 'your_password'
    }
  }
});

async function run() {
  try {
    const response = await reusableInstance.get('/ip');
    console.log('Success via HTTP Proxy:', response.data.origin);
  } catch (err) {
    console.error('Proxy Error:', err.message);
  }
}

run();
Expected output:
Success! Proxy IP: 45.77.56.122Similarly, keepAlive helps you reuse connections for multiple requests and avoid repeated TCP handshakes. This lowers latency and resource consumption at your end.
But since Axios doesn’t have this by default in Node.js, you configure keepalive by setting a custom https agent.
const axios = require('axios');
const { HttpsProxyAgent } = await import('https-proxy-agent');

async function alive() {
  const agent = new HttpsProxyAgent('http://username:[email protected]:8080', {
    keepAlive: true
  });

  try {
    const response = await axios.get('https://httpbin.org/ip', {
      httpsAgent: agent,
      proxy: false,
      timeout: 20000
    });

    console.log(response.data);
  } catch (error) {
    console.error(error.message);
  }
}

alive();
Expected output:
{ "origin": "45.77.56.122" }While keepAlive keeps a connection "warm," connection pooling helps you manage the total number of those connections. Without a practical limit, a script making 1,000 requests might open 1,000 simultaneous TCP tunnels, overwhelming server resources or getting your IP blacklisted.
As a countermeasure, you can set the maxSockets parameter to implement waiting-room logic. This enables the agent to allow a specific number of active connections at once, while the surplus requests queue until a socket becomes free.
const axios = require('axios');
const { HttpsProxyAgent } = await import('https-proxy-agent');

async function testPooledProxy() {

    const agent = new HttpsProxyAgent('http://user:[email protected]:8080', {
    keepAlive: true,
    maxSockets: 10,
  });

  try {
      const response = await axios.get('https://httpbin.org/ip', {
      httpsAgent: agent,
      proxy: false,
      timeout: 30000
    });
   console.log('Pooled Request Success:', response.data.origin);
  } catch (error) {
    console.error('Connection Error:', error.message);
  }
}

testPooledProxy();
Expected output:
Pooled Request Success: 45.77.56.122Pro tip: If Axios proxying feels limiting for certain use cases, you can also look into making HTTP requests in Node.js using fetch for more control over request behavior.
Why Proxy rotation with Axios?
Proxy rotation enables developers to build professional-grade scrapers by distributing the load and reducing repeated requests from a single IP address. Without rotation, it’s only a matter of time before you face throttling or get errors such as 403 Forbidden or 429 Too Many Requests.
However, you should note that IP rotation doesn’t guarantee access and should be paired with rate limits, retries/backoff, and respectful request patterns
But there is more to proxy rotation as discussed subsequently.
Evading Rate Limits with Round-Robin Rotation
Though we can define functions to randomly use proxies, Round Robin is the standard way to evenly distribute requests among proxy IPs. This is particularly helpful for scraping sensitive targets that might otherwise rate-limit you.
const axios = require('axios');
const proxies = [
{
protocol: 'http', host: '31.59.20.176', port: 6754,
auth: { username: 'user_alpha', password: 'pass_alpha_123' }
},
{
protocol: 'http', host: '23.95.150.145', port: 6114,
auth: { username: 'user_beta', password: 'pass_beta_456' }
},
{
protocol: 'http', host: '198.23.239.134', port: 6540,
auth: { username: 'user_gamma', password: 'pass_gamma_789' }
}
];
let idx = 0;
async function fetchWithRotation() {
const proxy = proxies[idx % proxies.length];
idx++;
try {
const res = await axios.get('https://httpbin.org/ip', { proxy });
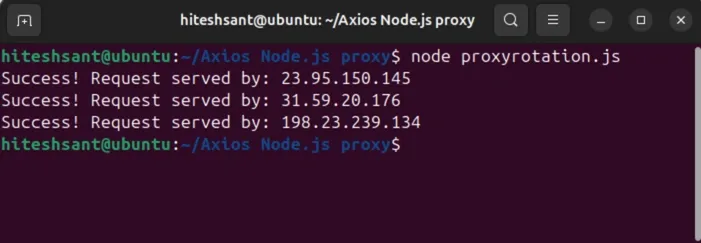
console.log(`Success! Request served by: ${res.data.origin}`);
} catch (err) {
console.error(`Proxy ${proxy.host} failed: ${err.message}`);
}
}
fetchWithRotation();
fetchWithRotation();
fetchWithRotation();Running the function outputs every IP once, indicating no overuse. Check the screenshot below:
Building Resilient Systems with Retries and Failover Logic
Despite deploying the best proxy rotation strategy, some of your requests still fail. This can be because of timeouts, dead exit nodes, etc. Therefore, if you don’t implement failover logic, your script will crash right away. However, you can define logic to try the next proxy when a proxy fails to connect for any reason.
Check the following snippet, which implements a retry loop that cycles through your proxy pool, skipping dead nodes until a connection is successful or the retry limit is hit.
import axios from "axios";

function createProxyRotator(proxies) {
  if (!proxies.length) throw new Error("Proxy list cannot be empty");

  let i = 0;
  return () => proxies[i++ % proxies.length];
}

const nextProxy = createProxyRotator([
  { protocol: "http", host: "proxy_IP_1", port: port_number_1 },
  { protocol: "http", host: "proxy_IP_2", port: port_number_2  },
]);

async function fetchWithFailover(url, retries = 3) {
  let lastError;

  for (let i = 0; i < retries; i++) {
    const proxy = nextProxy();

    try {
      return await axios.get(url, { proxy, timeout: 5000 });
    } catch (err) {
      lastError = err;
      console.warn(`Attempt ${i + 1} failed via ${proxy.host}:${proxy.port}`);
    }
  }

  throw lastError;
}
Choosing Between Sticky Sessions and Rotating IPs
IP rotation is generally preferred for high-volume web scraping, where you want to distribute requests across the proxy pool. Here’s a snippet that rotates IPs per request:
import axios from "axios";

const proxies = [
  { protocol: "http", host: "proxy_IP_1", port: port_number_1 },
  { protocol: "http", host: "proxy_IP_2", port: port_number_2 },
];

let i = 0;

async function fetchWithRotation(url) {
  const proxy = proxies[i++ % proxies.length];
  return axios.get(url, { proxy });
}
Alternatively, sticky IPs are fit for targets restricted by logins. Here, switching IPs mid-sessions can get you flagged. So, the idea is to mimic a human who stays on one connection while browsing multiple pages.
import axios from "axios";

const proxies = [
   { protocol: "http", host: "proxy_IP_1", port: port_number_1 },
  { protocol: "http", host: "proxy_IP_2", port: port_number_2 },
];

const proxy = proxies[Math.floor(Math.random() * proxies.length)];

async function fetchWithStickyIP(url) {
  return axios.get(url, { proxy });
}
Automating Proxy Management with Axios Interceptor
Axios interceptors are an efficient way to centrally modify outgoing requests and incoming responses. Technically, an interceptor acts as a middleman that catches every outgoing request before it leaves your server.
For instance, you can apply proxy rotation, inject authentication, switch protocols, and more in a single place, without configuring logic for each request separately.
Here’s a simple example to demonstrate basic proxy rotation using a request interceptor.
import axios from "axios";

const proxies = [
  { protocol: "http", host: "proxy_IP_1", port: port_number_1 },
  { protocol: "http", host: "proxy_IP_2", port: port_number_2 },
  { protocol: "http", host: "proxy_IP_3", port: port_number_3 },
];

let i = 0;

const proxyClient = axios.create({
  timeout: 5000,
});

proxyClient.interceptors.request.use(
  (config) => {
    // Inject the next proxy from the pool
    config.proxy = proxies[i++ % proxies.length];

    console.log(`Routing request via: ${config.proxy.host}:${config.proxy.port}`);
    return config;
  },
  (error) => {
    return Promise.reject(error);
  }
);

async function startScraping() {
  try {
    const response = await proxyClient.get("https://httpbin.org/ip");
    console.log("Connected IP:", response.data.origin);
  } catch (err) {
    console.error("Request failed:", err.message);
  }
}

startScraping();
Choose the right proxy type for Axios
Selecting the right proxy for your Axios client depends on your target’s security posture. For example, datacenter proxies are the fastest and most cost-effective options. Due to their datacenter origin, you can benefit from aggressive timeout settings and connection stability. These are best suitable for low-risk, high-volume work.
On the other hand, residential proxies are sourced from real user devices. This makes them great at bypassing CAPTCHA and anti-bot systems. Developers generally deploy residential proxies for social media and e-commerce. If you’re interested, try our 1GB free residential data to see it all in action.
Finally, ISP proxies provide residential-level trust with performance on par with datacenter proxies. These IPs enable sticky sessions, preventing session drops during multi-step Axios calls such as logins or checkouts.
Please note that you need not use a proxy at all for internal APIs or with your trusted partners. Similarly, small-scale testing also does not warrant proxy use.
Troubleshooting Axios proxy errors
In the following sections, we will go through solutions to some of the most common errors you may encounter when using Axios with proxies in Node.js.
ECONNREFUSED, ETIMEDOUT, and 407 errors
In most cases, ECONNREFUSED points to the fact that the proxy server is down or you’re hitting the wrong port. You should check the configuration for a typo or change the proxy server.
ETIMEDOUT is a common sign for an overwhelmed ( and often free) proxy server. This error implies that the proxy server took too long to respond. We suggest increasing the timeout to see if it works (especially for residential IPs) or switching to a paid proxy service.
Another one is 407 Proxy Authentication Required, which occurs when the login credentials are incorrect, or the auth object is missing entirely or incorrectly structured when connecting to a private proxy server.
This may also mean your IP isn’t authorized by your proxy provider to make requests. Either way, check the authentication in the script, followed by contacting the proxy server if you are still stuck.
HTTPS tunneling issues and protocol mismatches
Error: socket hang up, ECONNRESET, or EPROTO occurs when trying to connect to an HTTPS target via an HTTP proxy. This happens if Axios fails to establish a proper CONNECT tunnel or if connections drop during the TLS handshake stage.
You can get around this by using an https-proxy-agent and avoiding reliance on the native proxy object in complicated setups.
Likewise, you get ERR_INVALID_PROTOCOL if you try to establish a SOCKS5 or FTP connection without using an external agent. This is due to Axios's inherent limitation, which only supports HTTP and HTTPS. As a quick fix, use a wrapper like socks-proxy-agent to help Axios connect to a socks server.
User-Agent, DNS, and header leak checks
Getting repeated 403 Forbidden, 429 Too Many Requests, or CAPTCHA challenges is common when using web-scraping proxies against a heavily protected target. A simple first step we would advise is to use realistic user agents as follows:
const res = await axios.get('https://httpbin.org/headers', {
  headers: {
     'User-Agent': 'Mozilla/5.0 (Windows NT 10.0; Win64; x64) AppleWebKit/537.36 (KHTML, like Gecko) Chrome/122.0.0.0 Safari/537.36',
    'Accept-Language': 'en-US,en;q=0.9'
  },
  proxy: {
    host: 'proxy.example.com',
    port: 8080,
    auth: { username: 'user', password: 'pass' }
  },
});
Moreover, Node.js generally resolves a DNS request locally unless explicitly told otherwise. This can expose your actual DNS resolver, which can mismatch with your proxy IP and pose detection risks. So if your requests are still getting flagged despite using proxies, consider switching to configurations that support remote DNS resolution. For instance, prefer socks5h:// when you want DNS resolved through the proxy (remote DNS), if your agent/client supports it.
You also need to verify the anonymity level of the proxy because a transparent proxy might be passing your real server IP via the X-Forwarded-For header. That’s why it’s recommended to hit something like httpbin to check who is sending the requests after all.