


Some platforms don't support proxy username-password authentication. Managing credentials across multiple team members or multiple consumers can become impractical, and sometimes you just want access locked down to specific networks.
Proxy whitelisting is a practical solution to address these issues. This article explains what exactly proxy whitelisting is, how it works, and what to watch out for.
What is Proxy Whitelist?
A proxy whitelist, also called an IP allowlist, is an authentication mechanism that grants access to the proxy service based on your IP address rather than requiring login credentials.
A whitelist is an allowlist of IP addresses. Instead of sending username and password with every request, you maintain a list of whitelisted IP addresses with your proxy provider. When you connect to the proxy server from a whitelisted IP address, it recognizes you and grants access instantly without requiring you to enter your username and password.
If any connection request is received from an IP address outside of that whitelist, it will be rejected automatically, commonly via a 403, 407 error code or a connection failure message. But these connections can still succeed if you have fallback authentication enabled and valid credentials are included in the connection request.
| IP Whitelisting | Proxy Authentication |
|---|---|
| The proxy server allows traffic only from pre-approved IP addresses | Requests with valid login credentials are allowed regardless of the source IP address |
| It enhances security by avoiding the risk of credential theft, reduces security exposure with automated scraping tools, and removes the need for password management | It poses the risk of credential theft, expands the attack surface as the credentials must be embedded in automated tools configuration and code, and password management is critical to avoid unauthorized access |
| It is reliable with a static IP address and is not suitable for users with dynamic IP environments | It is highly flexible as it allows access from anywhere with valid login credentials |
Which proxy types commonly support whitelisting?
IP whitelisting is the primary authentication method for static residential proxies, datacenter proxies, and dedicated private proxies. These specific types are preferred for implementing proxy whitelisting because they provide consistent, fixed IP addresses, which makes the whitelist stable and simple to manage.
While you can implement proxy whitelisting for rotating residential proxies as well, the volatility of IP addresses makes maintaining it an operational burden. Static IP addresses are often the standard for whitelisting, not because they are the only option, but because they make the process functional, reliable, and secure.
IP whitelisting on proxy servers is less common than username-and-password authentication. This is because customers use username and password fields to pass additional targeting parameters, which can include country, city, ASN, or carrier to backconnect networks. This allows the users to connect to the proxy IP that matches their specified requirements.
When switched to IP whitelisting, there is no username field to carry those parameters. Consequently, the ability to target specific locations depends entirely on the proxy provider. If the proxy provider allows you to set these preferences via a dashboard, an API, or dedicated sub-endpoints, you can still utilize targeting. Otherwise, whitelisting may limit you to the provider's default settings.
How to set up a Proxy whitelist? Step-by-Step Guide
Setting a proxy whitelist is a straightforward process, and some steps may vary depending on your proxy provider. In this guide, we will demonstrate the process through our dashboard so that you can get a general idea of how to do it, regardless of the proxy provider you use.
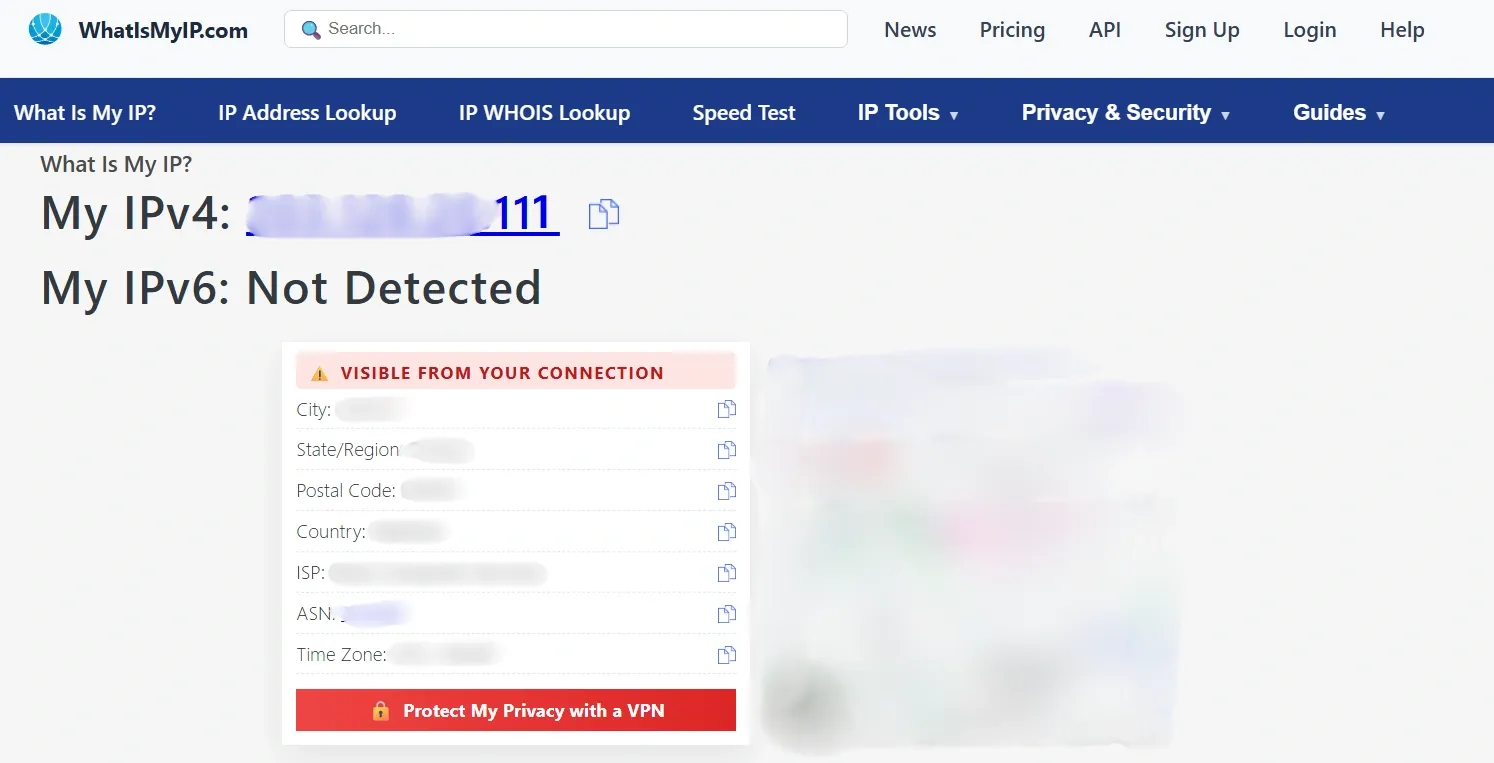
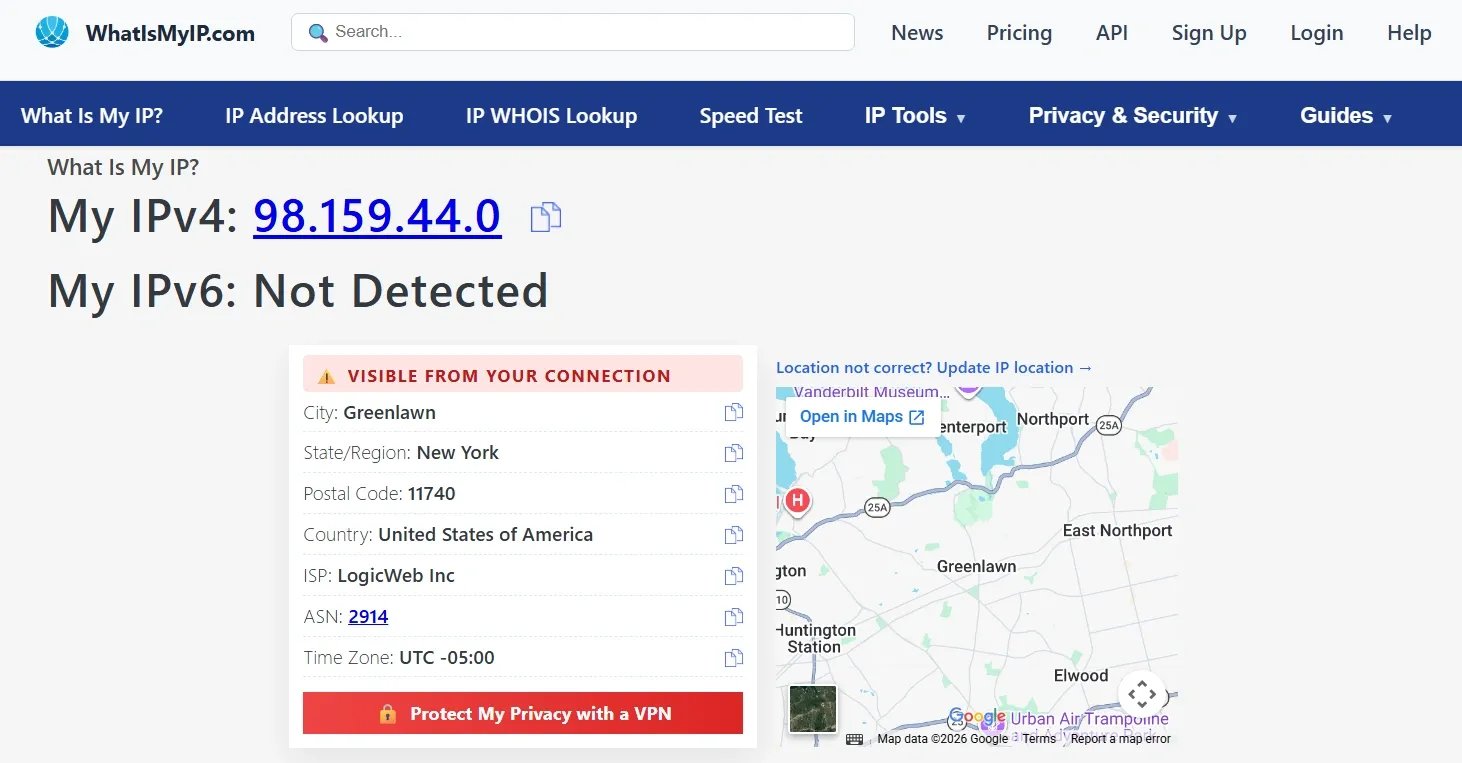
Find your public IP address
When setting up a proxy whitelist, you must whitelist your public IP address, not your private IP address. There are multiple ways to find your public IP address. One of the most convenient ways to do this is to use an online service like whatismyip.
All you need to do is visit this website, and it will show you your public IP address. Copy the IP address, then use it to set up the proxy whitelist.
Add the IP to your proxy provider dashboard
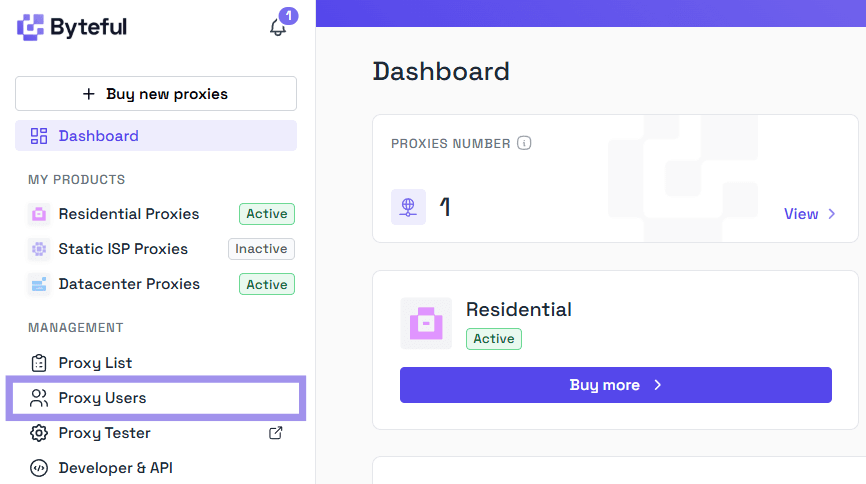
Once you have your public IP address, the next step is to add it to the proxy dashboard.
1. If you’re using our service, log in to the dashboard and look for Proxy Users in the left side panel.
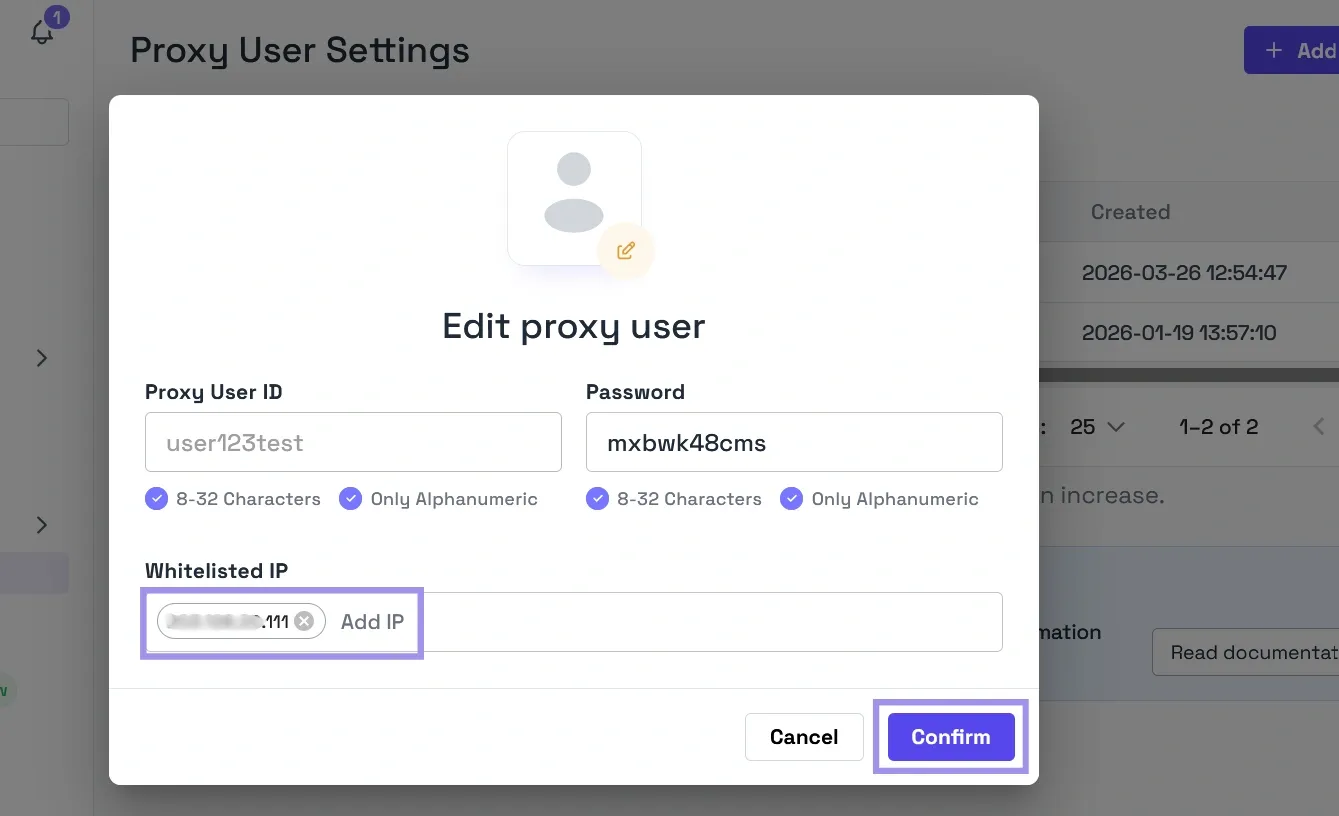
2. Once you are in the proxy user settings, you can either add a new user with a whitelisted IP address or whitelist the IP address for an existing user.
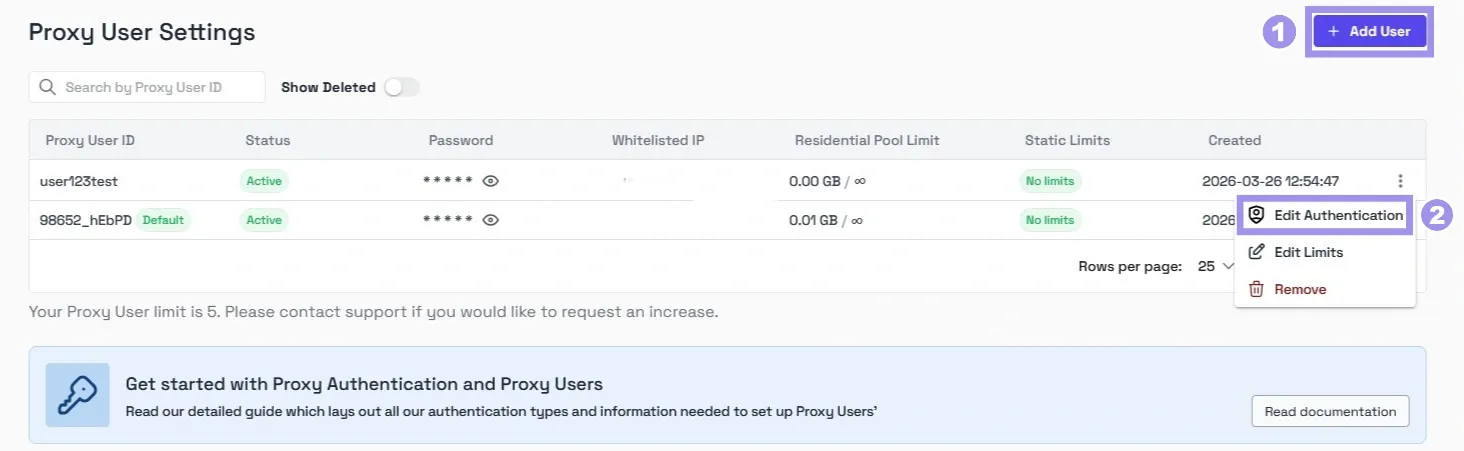
3. To whitelist the IP address, type in your public IP address into the whitelisted IP field, hit Enter, and click Confirm to save the changes.
If the IP address is not linked to any proxy or other user on the platform, it will get added to the whitelist without any issues.
Your public IP address is now whitelisted, and you can access proxies without the need for login credentials. You can also see the whitelisted IP addresses for all the users on your dashboard.

We also provide options to set Access Control List (ACL) Rules for your proxy users, limiting their access to the proxies using the Edit Limits option.
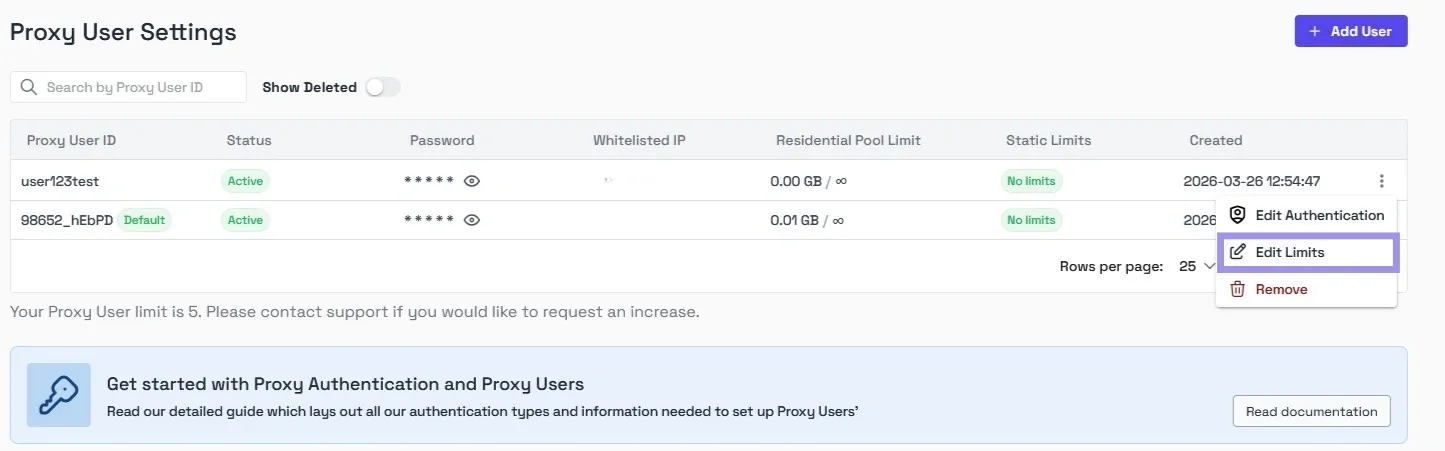
From our dashboard, you can limit access to residential proxy pools by bandwidth. For ISP proxies & datacenter proxies, you can limit access by service and proxy.
ACL rules give you fine-grained control over how each proxy user can interact with the proxies and what proxies they can access on your account.
Apply the proxy configuration on the platform of your choice
Once your IP address is whitelisted, you can configure the proxy on any platform or application of your choice.
It can be on your Android or iOS device, on Windows, or in a web browser. Here is the guide to configure the proxy on some of the platforms and applications:
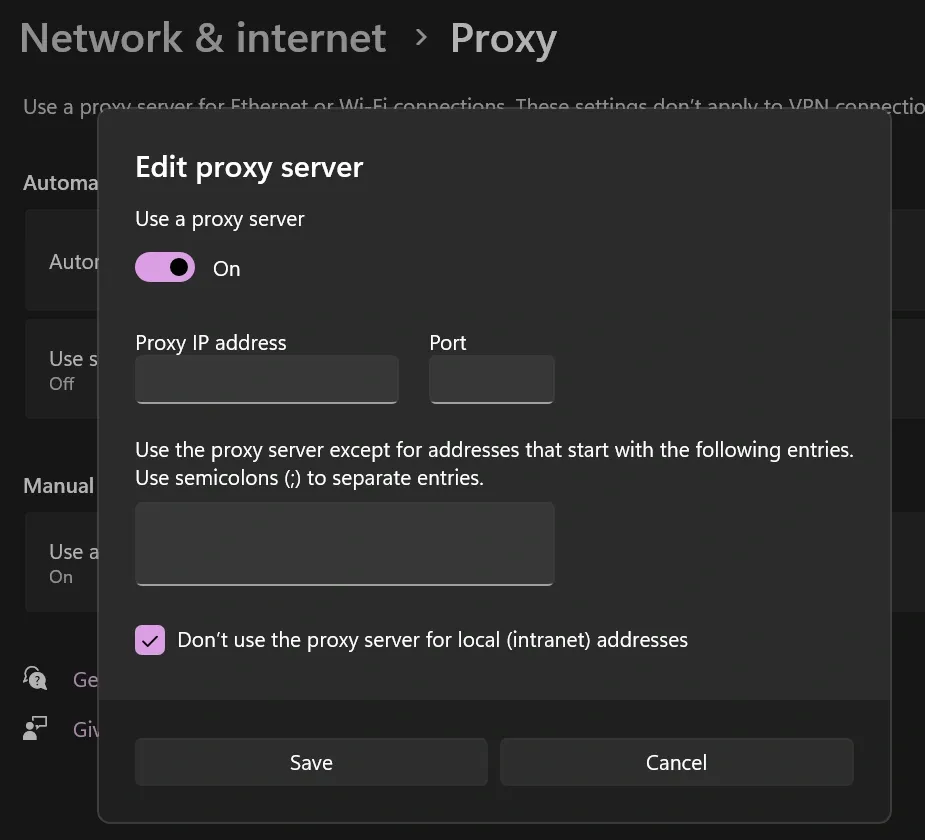
Windows:
1. Open Settings, then navigate to Network & Internet > Proxy.
2. Navigate to Manual Proxy Setup and enable the toggle.
3. Enter your proxy IP address and the port number.
4. Click Save, and now your computer will use the configured proxy connection when connecting to the internet.
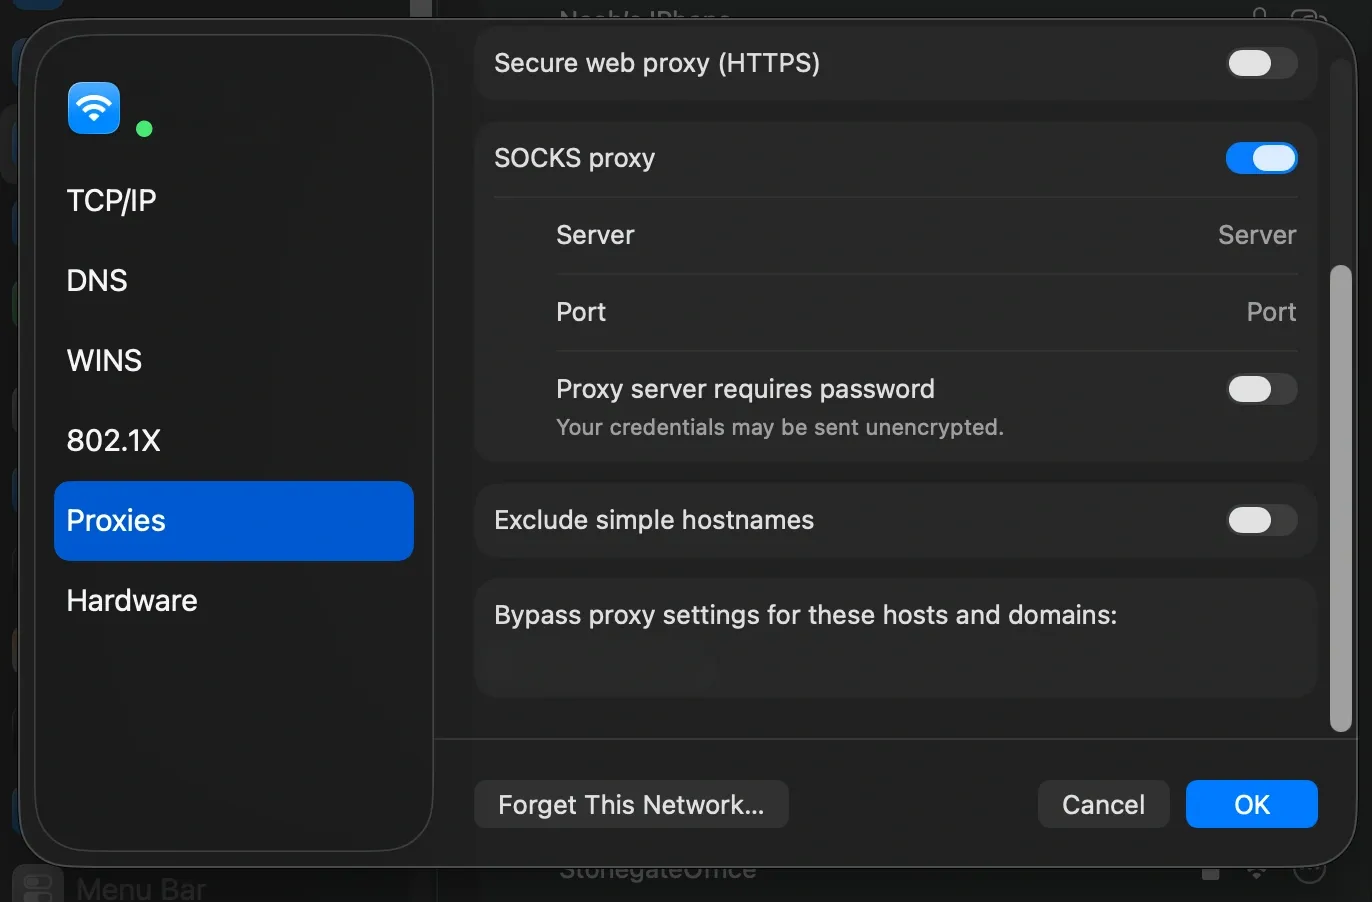
macOS:
1. Open System Preferences and select Network.
2. Select your active connection (e.g., Wi-Fi), click Details > Proxies
3. Enable the desired protocol (HTTP/HTTPS/SOCKS) and enter the Proxy Server Address and Port number.
4. Click OK to save the proxy settings.
Browser:
One method of configuring a proxy in a browser, such as Microsoft Edge or Safari, is to save the proxy settings on the system. The browser will use the system-configured proxy settings and transmit the traffic through the proxy.
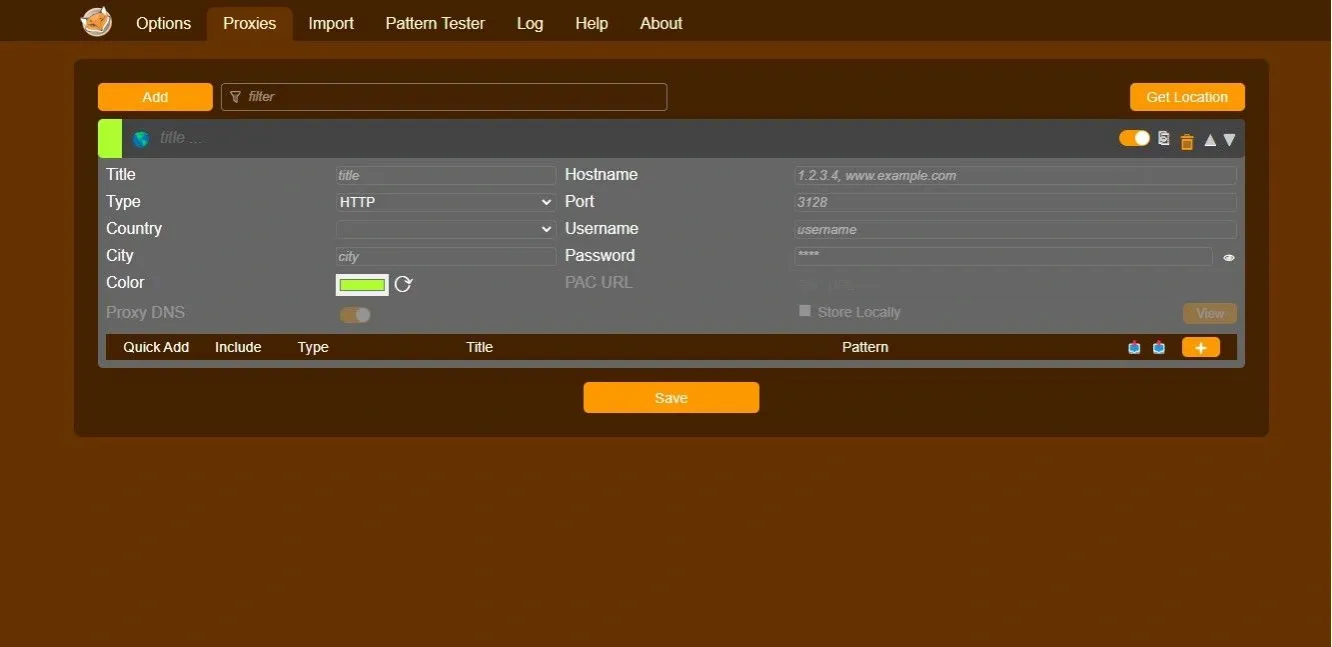
The other way is to use a browser extension like FoxyProxy. Here are some steps to configure the proxy through the extension:
1. Open FoxyProxy, then navigate to the Proxies tab and click it.
2. Next, click on Add and give it a title. Enter the proxy IP address and port number.
3. Click Save, and you can now use the proxy configured by the extension to access the internet.
If you are failing to connect to the internet after configuring the proxy, verify that you have added the correct proxy IP address and port number in the configuration.
Test the connection and verify traffic routing
Finally, you can test the connection to verify that your traffic is routing correctly through the proxy server.
The simplest way to verify the connection is to visit a site like whatismyip while you are connected through the proxy.
If the IP address displayed there matches your proxy provider’s exit IP rather than your public IP address, the whitelist is working as it should, and you are ready to proceed.
Benefits and Use Cases of Proxy Whitelisting
Proxy whitelisting has selective benefits over traditional credential authentication systems, and some of them are listed as follows:
Simpler authentication without credentials
Since you don’t need credentials to access proxy servers with IP whitelisting, this simplifies the authentication process and reduces credential sharing. It also removes the overhead of distributing, rotating, and securing credentials.
A team of data engineers using proxies to ethically scrape public data can use proxy whitelisting to whitelist their office public IP address once, and then every team member can connect to the proxies without needing to enter credentials.
Tighter access control for static network locations
If your infrastructure runs on static IP addresses, whitelisting ensures that only those specific locations can access the proxies.
A company can implement proxy whitelisting to authenticate its corporate office’s public IP address on the proxy server, ensuring that no one else can use the proxies from any other location.
Cleaner access for teams with shared Public IP
If multiple team members connect through a shared office network, whitelisting that single IP address grants access to everyone on that network.
A company with employees working from a central office can use proxy whitelisting to whitelist the office network's single public IP address in their proxy provider's dashboard. New hires get proxy access automatically, and offboarding requires no password changes or credential revocations.
Cleaner Automation without embedded credentials
IP whitelisting allows automated tools and scripts to access proxy servers without storing sensitive details like credentials in configuration files or code.
A freelancer running Python scrapers on a cloud VM can use proxy whitelisting to authenticate that server's public IP address once. After that, manual script execution can use the proxy without embedding the proxy username and password in the code or environment files.
Reduced attack surface by eliminating credentials
By removing the need for login credentials to access proxy servers, IP whitelisting reduces the attack surface as it eliminates the risks of credential theft and abuse.
If a company’s former employee attempts to abuse the proxy authentication credentials to connect to the proxy, it will not be successful, as the source IP address will not be authenticated in the proxy whitelist.
Risks and limitations of Proxy Whitelisting
Proxy whitelisting offers a credential-free way to authenticate, and like any access control method, it comes with its own risks and limitations. Here are some of the key factors to weigh against your specific setup before you implement proxy whitelisting:
Dynamic IP churn and accidental lockouts
If your IP address changes for any reason, you will be locked out of the proxy server, which can be a huge inconvenience if you don’t have a fallback authentication system enabled. To encounter this, you will have to log in to your provider's dashboard and update the whitelist.
Shared networks, NAT, and IP mismatch issues
When you are on a shared network like a VPN gateway or a public network, a single public IP address is shared by multiple people on that network. Whitelisting that shared public IP address will give proxy access to everyone on the network.
You can also experience some issues with IP mismatch, which can occur due to multiple reasons like ISP rotation, router reboot, or accidentally whitelisting your network’s private IP address instead of the public IP address. This will leave you locked out until you update the whitelist.
This issue is even more common on mobile networks. Your phone's cellular connection frequently changes public IP address as you move between towers or when the carrier reassigns IPs from its pool. Because mobile networks frequently rotate IP addresses, proxy whitelisting is unreliable unless you route traffic through a static VPN gateway first.
Stale allowlists and over-permissioned access
If the allowlist is not managed properly, it can contain stale entries, which increases risk by granting proxy access to the IP addresses that are no longer authorized. This can lead to unauthorized access to the proxies.
Allowlists with stale entries and over-permissioned access can also disrupt operations if you hit your proxy provider’s maximum allowlist size. This will prevent you from whitelisting new IP addresses that need access to the proxy server.
Maintenance and Scalability
With IP whitelisting, regular maintenance is required to make sure that authorized networks have access to the proxy server and the unauthorized addresses are scoped out. Manually managing an allowlist for large organizations is unsustainable, prone to human error, which can lead to unauthorized access and can also prevent authorized access to the proxies.
Troubleshooting proxy whitelist issues
With proxy whitelisting, you can face several issues, and knowing how to troubleshoot them can help with the workflow.
- Proxy still asks for credentials: This can happen if your IP is not recognized as whitelisted and the system falls back to the credential authentication. Verify that your public IP matches what is in your provider's dashboard. If you are on a corporate or VPN network, whitelist that IP address instead of your local IP.
- Your IP has changed and is no longer recognized: This is usually experienced in dynamic IP environments where your IP address changes frequently. Logging in to your provider’s dashboard and updating the whitelist typically resolves this issue.
- IPv4 vs IPv6 mismatch: This usually means that you whitelisted IPv4, but your traffic is exiting via IPv6 or vice versa. Check what IP type your proxy provider expects and whitelist that version of your public IP address to resolve the issue.
- The whitelisted IP was added to the wrong order or account: Proxy providers with multiple accounts or orders often require the IP to be whitelisted at a specific order level and not globally. To avoid this issue, double-check you are in the correct order or account when whitelisting your IP address.