


Are you setting a proxy on the iPhone? If you have done it before, you might have easily set up HTTP and HTTPS proxies. But what about SOCKS5 proxies?
Well, this guide covers everything from generating proxies to understanding IP whitelisting and why SOCKS5 configurations fail. We will also provide a complete, step-by-step method for configuring a proxy on iPads/ iPhones, while presenting the best third-party apps for SOCKS5 proxy setup.
What are iOS native proxy capabilities?
iOS devices allow you to configure HTTP and HTTPS proxies for Wi-Fi networks, enabling traffic to be routed through a specified server. However, these settings do not work on SOCKS5 proxies or cellular data without third-party apps.
Moreover, iOS proxy settings are configured per Wi-Fi network and generally apply to traffic that respects the system proxy settings, rather than granular control for individual apps. This means all apps using standard networking APIs will route traffic through the configured proxy.
But some apps with custom networking stacks or those using protocols like QUIC may bypass all of these settings, depending on the app’s implementation. Therefore, you can face some problems when you want to apply proxy usage across all applications.
Apple also provides a supervised mode that supports global HTTP proxy configurations. This feature routes most HTTP and HTTPS traffic through a designated proxy server across different networks. But some apps may still bypass these settings depending on their implementation. But it might not address the need for SOCKS5 support or granular app-specific proxy settings.
That said, you can overcome these limitations with some third-party solutions apps that offer improved proxy capabilities. They also support other protocols like SOCKS5 and may allow proxy usage for individual applications.
What is Manual vs Automatic (PAC) configuration?
Manual proxy configuration requires users to manually enter the IP address and port number of a proxy server. It can be applied via HTTP proxy configuration in managed environments. However, it lacks flexibility because you have to manually update on each device after every proxy change or rotation. That’s why it is better for use cases where you only need to work with a single proxy server.
On the other hand, Proxy Auto-configuration (PAC) files allow rules-based proxy selection. They choose which proxy to use per destination. Also, they are centrally managed, so you don’t have to manually update individual client settings. This approach is useful when you need true control over how traffic is routed.
How to set up a proxy on an iPhone/iPad?
Proxy setup on iOS provides some advantages over Android proxy configuration, such as built-in authentication support. Android often requires IP whitelisting because it lacks built-in authentication. In contrast, iOS allows you to secure connections using credentials, simplifying the process.
Here are the steps to configure a proxy on an iPhone/iPad:
1. Start by generating proxies. Select a proxy type (Residential, Datacenter, or Static ISP). The steps vary based on the proxy provider. At Byteful, all you need to do is choose the proxy type, select the protocol, format, adjust advanced targeting settings, and select quality to generate proxies.
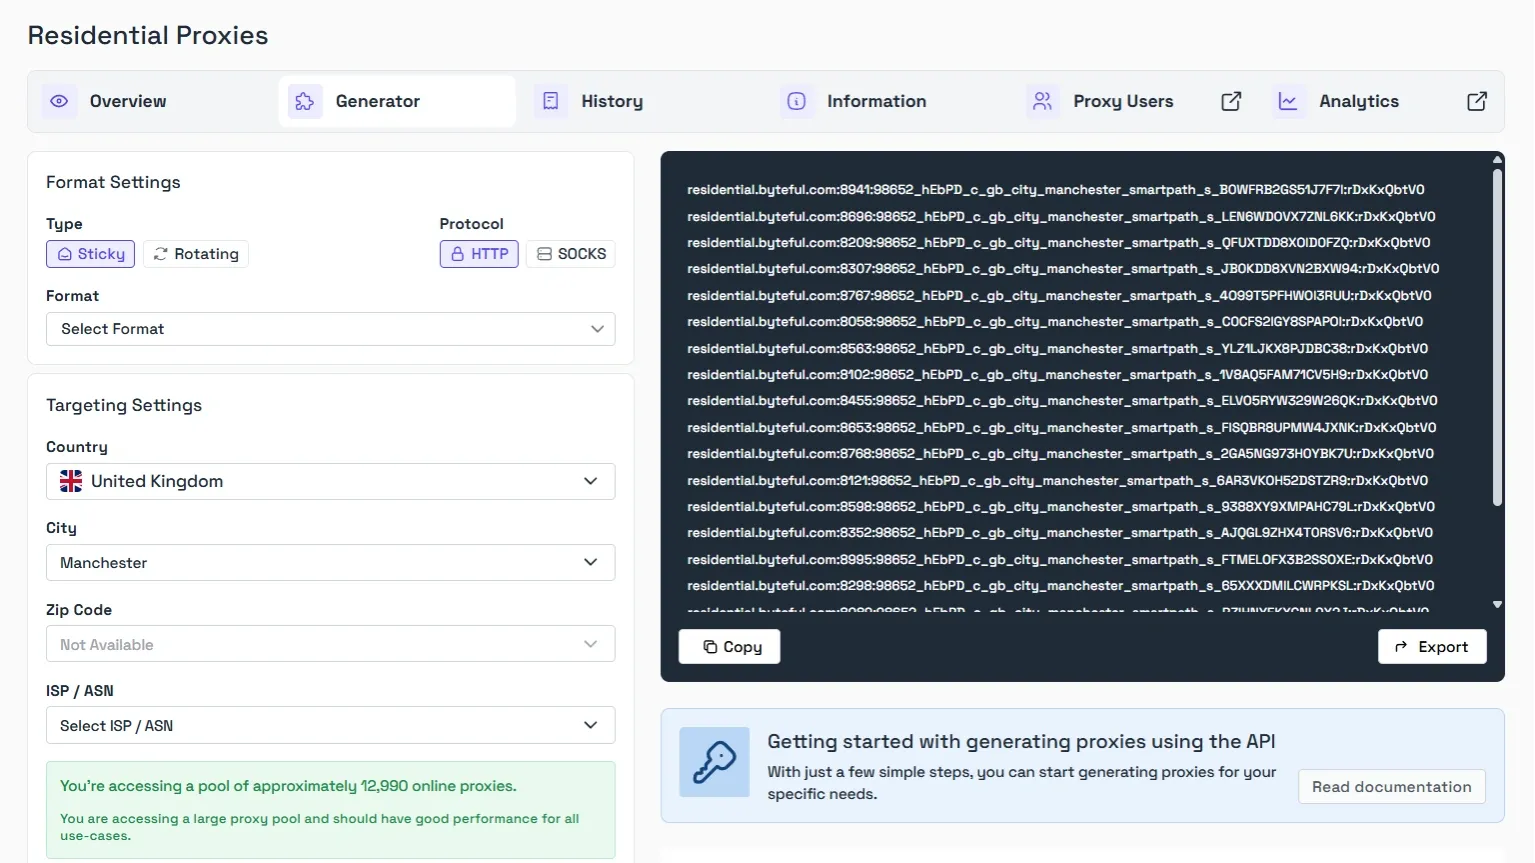
Pro tip: If you’re wondering what Smartpath is, it is a free in-house AI routing system that sends non-essential traffic via datacenter IPs. Enable it to reduce residential bandwidth and costs.
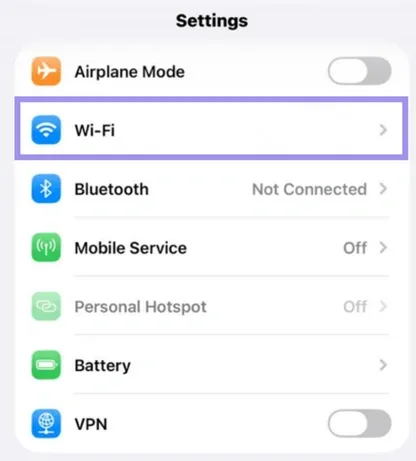
2. On your iPhone/iPad, open Settings and tap on Wi-Fi.
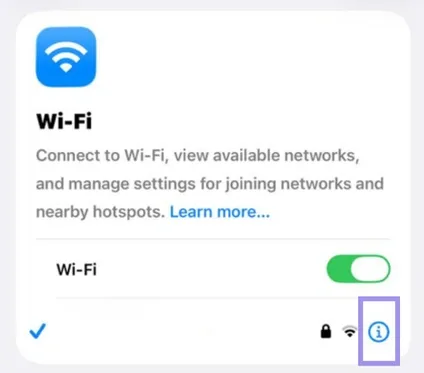
3. Now, tap the blue info icon next to your connected Wi-Fi network.
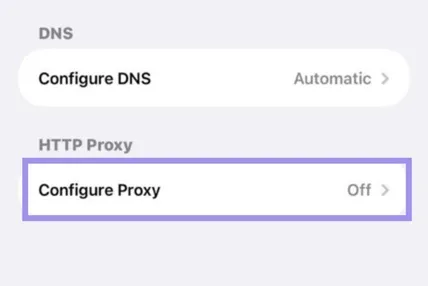
4. Scroll down to the HTTP Proxy and tap Configure Proxy.
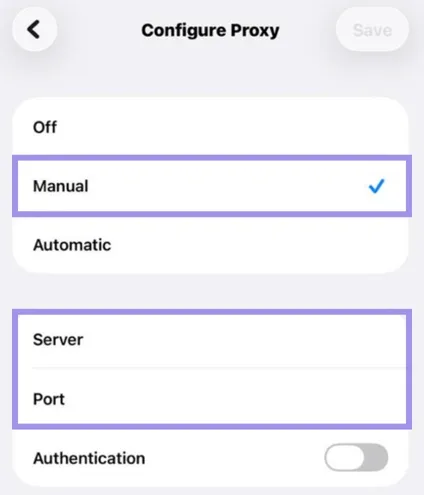
5. Then, choose Manual from the list. Type in Server and Port details in the dedicated fields.
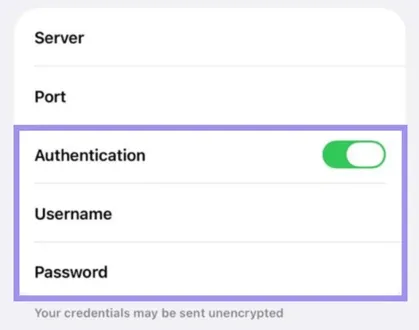
6. Turn on Authentication, then enter proxy Username and Password.
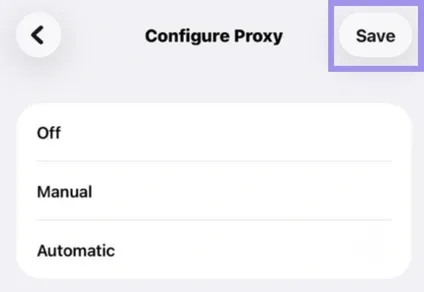
7. After entering all the information, tap Save in the top-right corner to apply the configuration.
8. Once the proxy is configured, it is important to validate. To do this, open Whatismyip on a browser and ensure it isn't the public IP address of your device
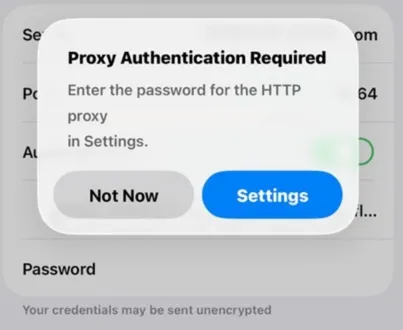
It is important to note that iOS doesn’t natively support SOCKS5 proxies. So, attempts to configure them using built-in settings will fail. The native system only supports HTTP and HTTPS proxies.
So, if you enter SOCKS5 details into HTTP proxies, the connection might fail. In some cases, iOS may display generic authentication prompts. But these are tied to HTTP proxy behavior, and SOCKS5 doesn’t use HTTP status codes like 407.
Fix the SOCKS5 proxy configuration issue on iPhone/iPad
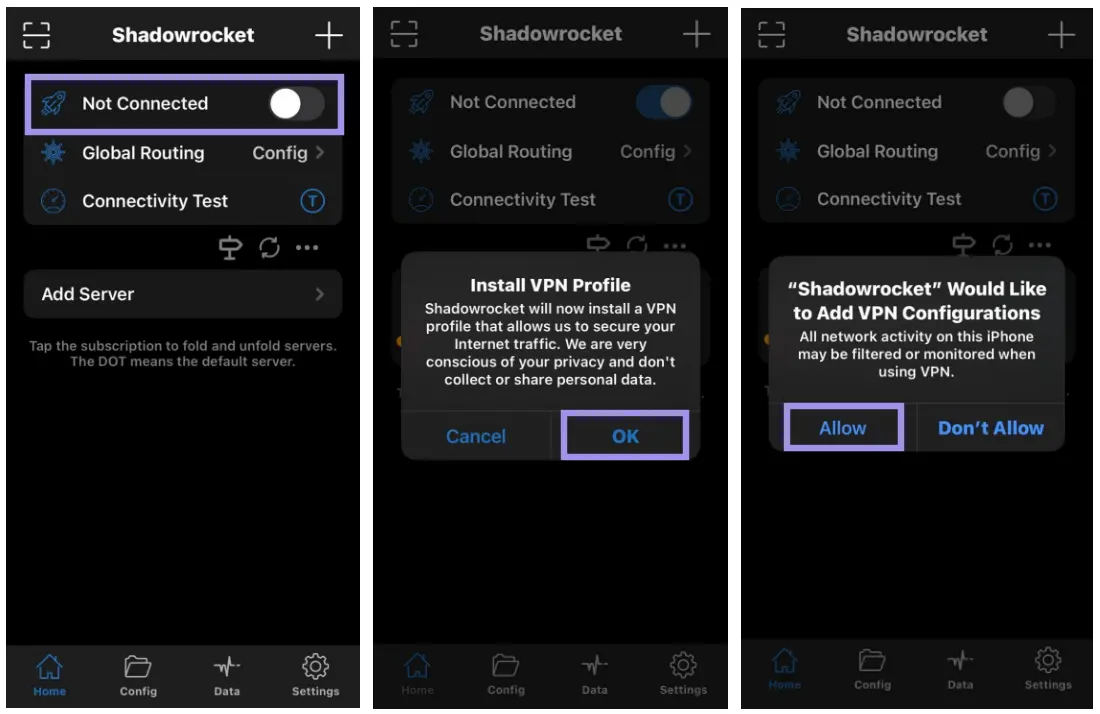
Many third-party applications provide a reliable workaround for configuring a SOCKS5 proxy on iPhone/iPad. Tools like Shadowrocket (paid - $2.99) make it easier to configure SOCKS5 proxies on iOS. Here are the steps for it:
1. Open Shadowrocket, tap +, select Type, and choose your protocol (e.g., SOCKS or Shadowsocks).
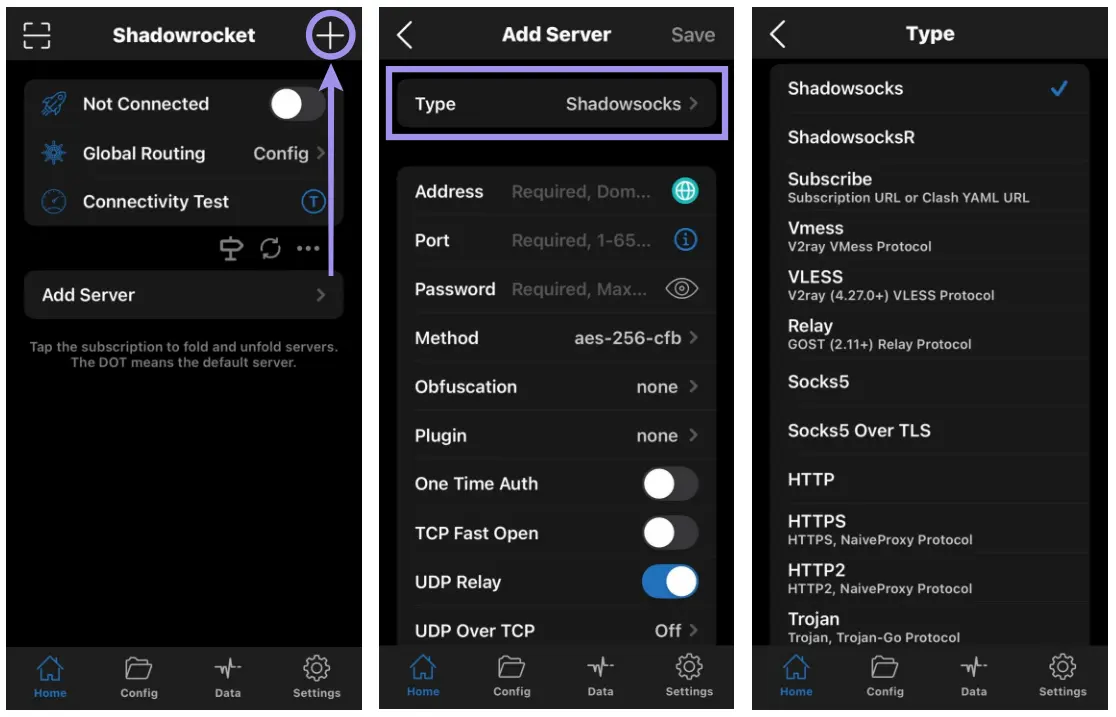
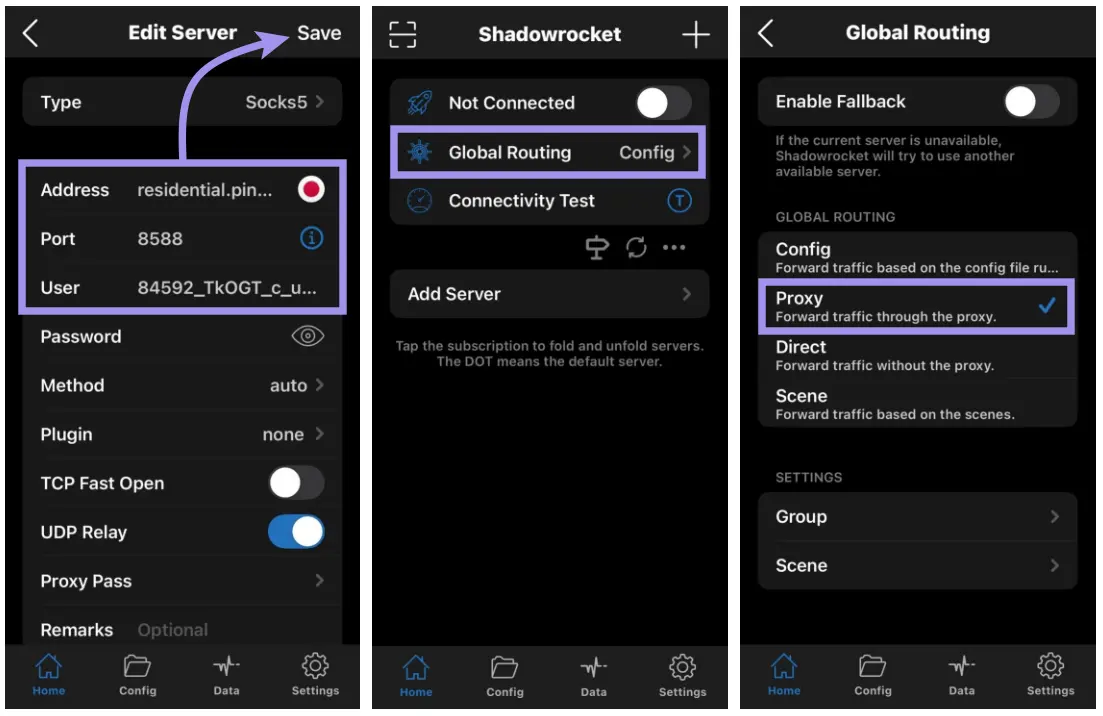
2. Enter your Address, Port, and credentials, then tap Save. Set Global Routing to Proxy to ensure all traffic is covered.
3. Toggle the switch and tap Allow to grant iOS VPN permissions.
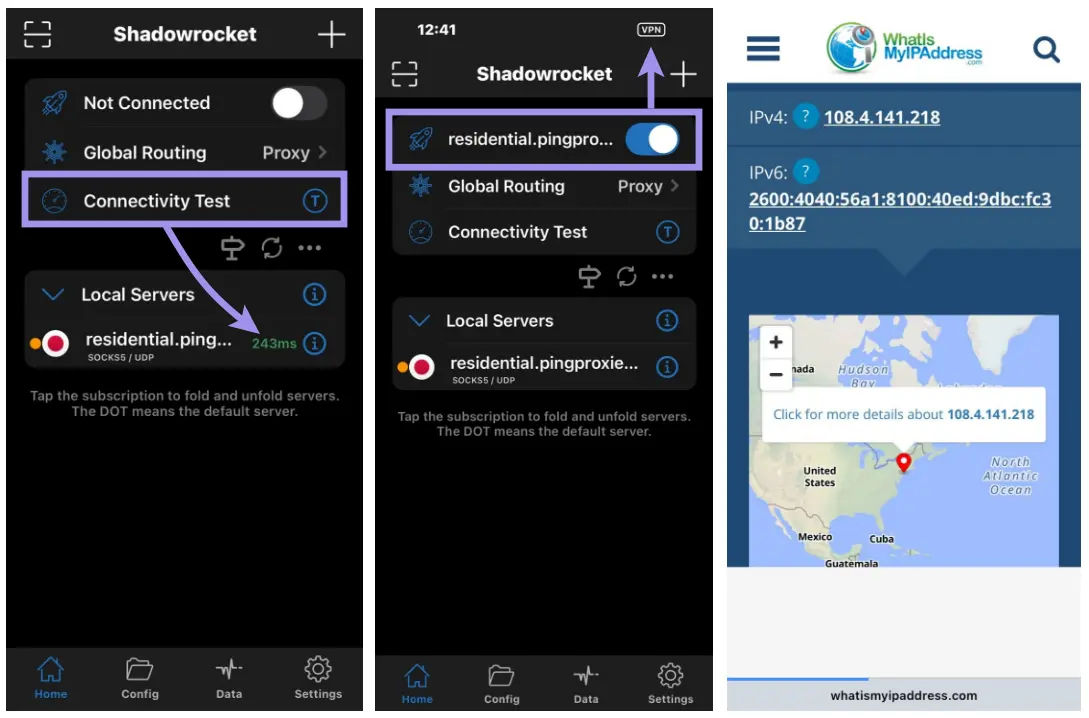
4. Use the built-in connectivity test or an IP checker to confirm the connection is active.
5. To avoid the hassle of checking each proxy from the list manually, you can use Byteful’s Proxy Tester to verify proxy functionality.
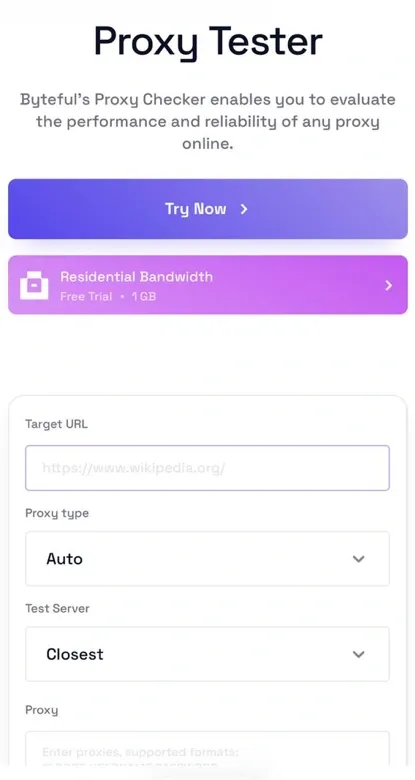
Does the issue still exist? Double-check all your credentials and make sure the app actually supports SOCKS5. You should also verify your subscription with the proxy provider. If you don’t have any proxies, no need to worry. You can get started with our 1GB free trial to test proxies on your iOS device.
Best SOCKS5 apps for iPhone/iPad
You can use these rule-based proxy utility clients, which support SOCKS5, to overcome limitations on iPhone or iPad. They allow you to route traffic through custom proxy configurations:
- Potatso (free to download)
- Surge (free to download)
- SocksSSH (free to download)
- Super Proxy (free to download)
- Loon
Note: The availability of these applications can vary by region and over time.
Additionally, you can use Apple’s iCloud Private Relay, a paid feature included with the iCloud+ subscription. Although it is not a SOCKS5 proxy, it provides enhanced privacy for browsing the internet in Safari.
It uses two separate relays to encrypt your DNS records and grant you a temporary IP address. So you can enjoy high-speed browsing without compromising your privacy.
Troubleshooting iOS/iPadOS proxy setup
If you have run into some problems with your iOS Proxy Setup, there’s no need to worry. Most of these issues can be easily fixed. So, let’s look at some of the common proxy errors and their solutions:
Proxy authentication errors
You should recheck your username and password provided by the proxy server. Sometimes, this error can occur if you have recently updated your credentials. So, you should clear the old credentials from your device. Turn the proxy settings off and back on. Also, try to forget the Wi-Fi network and reconnect to reset credentials if they are stored in cache.
Pages not loading or apps timing out
Usually, this problem occurs due to latency, a blocked port, or some misconfigured settings. Public Wi-Fi networks can also restrict some ports, which can affect your proxy functionality.
A quick solution is to switch to a different port or try using a private network. You should also make sure the proxy server is geographically close to your location to reduce latency.
Wrong protocol, hostname, or port
Wrong proxy details are a common error in iOS proxy setup. Make sure the proxy type/protocol matches what your provider gave you (HTTP/HTTPS proxy vs. SOCKS5) and that the port is correct. You can avoid this error by double-checking your details in your iOS settings under Wi-Fi > Configure Proxy.
Free proxies vs paid Proxies for iOS/iPadOS
Free proxy servers can sometimes cause slower speeds, unreliable connections, or security problems. Paid proxies are usually better due to their increased performance and the provider’s support. But the overall quality still depends on the proxy and the provider. For critical tasks or sensitive data, it is still a better idea to use paid, ethically sourced proxies.
Some basic tips can help you avoid proxy problems. You can toggle Airplane Mode, restart your device, or clear browser caches. If the problem still occurs, you can contact the proxy provider’s support team or review their educational materials. For instance, we provide detailed documentation for our proxies so you can understand how everything works.